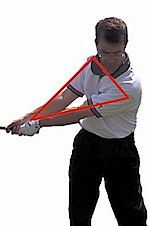
Showing posts with label shoulder. Show all posts

Saturday, January 4, 2014

Torso Turn

You know...I've made several faux pas on this blog, and if you read through carefully, you'll no doubt find contradictions and errors (because golf instruction is full of contradictions and disagreements), and I've fallen prey to my fair share of fixes and tips, only to change my mind about them later. Remember, the ultimate purpose of this blog was to document my discoveries and breakthroughs, and some of those, unfortunately, turn out to be dead-ends (though some of them may not be dead-ends for you).
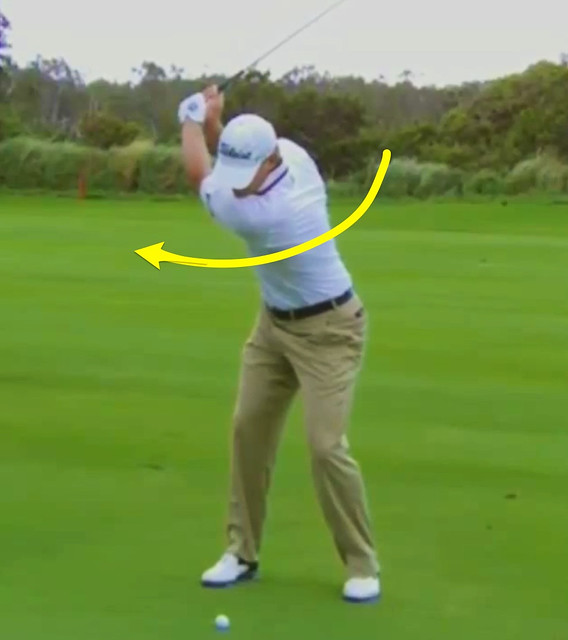
Torso Turn in Backswing
Torso Turn in the Backswing

But here's something I've stated a lot on this blog in numerous posts: "shoulder turn." What's the big deal? They turn, right? Well, yes. But we have to be careful, because each shoulder is capable of independent movement with respect to the torso (the rib cage and abdomen). The hips can also make a good deal of movement. The mid-spine (thoracic) and high-spine (cervical) have a wide range of rotation, while the lower spine (lumbar) is mostly limited to up-down movements. Yes, it's possible for you to FAKE a good turn by moving your arms, hips, and shoulder joints. This fake turn doesn't feature a lot of mid-torso movement, which is what we actually need. In other words, the mid-spine should turn the most, with the hips turning to complete the turn. The shoulders and arms MOSTLY go along for the ride.

Henceforth, when you read this blog and see the phrase "shoulder turn," please understand this is really synonymous--and actually more correctly descriptive--with an upper "torso turn." Is it a big deal? Yes. Because the shoulders will turn PASSIVELY when the chest and abdomen rotate back and through. Those muscles in the ribcage, back, and abdomen are the ones to focus on when conducting the takeaway, backswing, downswing, and finish. The shoulders, arms, wrists, and hands (and thus club) just go along for the ride MOSTLY (see gotchas below); there's no real need to consciously move them.

Actually, with just a torso turn, the arms are automatically brought to chest height during the takeaway. All that's necessary for the full arm motion from that point onward is a lift of the hands and club that amounts to about six inches of vertical movement above their address position! The torso turn provides the in, back, and up motion for the arms (i.e., depth), while a slight lift due to the right elbow bending provides the remaining up (i.e., width); no more is needed because of the posture (left shoulder low, right shoulder high). Yes, the arms lift, actually, very little in the backswing, and they DO NOT pull the body back at all! They merely lift up slightly. The hands should feel very wide and far away from your head and shoulders, but there should be no tension in getting there: Swing the hands away wide using your torso and let your arms stop moving when your torso stops turning!

I love to think of the torso as a large cylinder that juts out at an angle from a bulky bipod (legs). Using that analogy, it's much like a large reflecting telescope, pointing approximately 45-degrees into the sky (i.e., forward flexion or spine angle), sitting on a two-legged stand. Now for the backswing and downswing motion, just think of the telescope cylinder itself rotating IN-PLACE clockwise (back) and counter-clockwise (left) [something a real telescope would never do], while maintaining that 45-degree tilt!

If that’s difficult to envision, imagine a large dowel, rod, or pole that runs through the mid-back and through each latissimus dorsi muscle, about 3 inches below each armpit and extends out from the body about a foot on either side. The focus here is to first point the “lat dowel” at the ball and then “hit” the ball with the other end of the “lat dowel.” On the backswing, point the left side of the dowel down towards or even behind the ball for a big windup. Midway through the downswing, the dowel will be roughly parallel with the ground on both sides. Just after impact, the right side of the dowel will point down towards the ball, indicating that you have used lateral bend. At the finish, the right side of the dowel will point forward and to the right of the target, depending on your flexibility. At all times the imaginary “lat dowel” has rotated around on a tilted plane, which is ironically the visual analogy that is often used for the shoulder line. But remember that each shoulder has a generous range of independent movement in multiple directions, which makes it easy to fake a good torso turn by moving the shoulder joints. Moving the “lat dowel” eliminates the cheating. The "lat dowel” analogy is a very effective swing thought for the short game: chipping, pitching, greenside bunkers, and putting too.

A swath of golfing problems will disappear when you learn to maintain your posture or spine angle and simply turn the upper torso back and through (i.e., use the torso muscles to turn). Many of the aspects of the swing that are taught independently are suddenly addressed, automatically. I've found more power and consistency with increased lag, because the wrists are less likely to flip. I've found that my hips don't move as much in relation to my upper body. Posture or spine angle maintenance is reinforced, such that the shoulders rotate perpendicular to the forward flexion angle. The tension in the left lat muscle--the sign of a good backswing coil--suddenly shows up. Because the arms, wrists, and hands are passive, the angle of the club face stays in the correct position in the takeaway, mimicking the spine angle. I've found the same torso motion is used, more or less, in every golfing stroke, including chipping and putting.

As the shoulders turn in response to the torso turn, forget the "left shoulder to right foot" tenet; focus instead on the right shoulder and ensure that it gets as near as possible to the RIGHT foot (i.e., the sternum should be over the inside of the right foot), which automatically creates the necessary tilt behind the ball and prohibits reverse pivoting while preserving a proper coil. This thought is especially important for the driver, but a more centered pivot might be the ticket for irons, pitch shots, and chips.

The gotchas (at least for me): Ensure the arms are lifting at the same rate your mid-torso is turning to keep your arms in front of you. You should be able to--during rehearsals--look at the club head during the takeaway and notice that it's still well outside the hands and the club face angle matching the spinal posture. If you just let the arms go and focus only on turning the mid-torso, you may suck the club inside early and then lift the arms late; the left arm ends up too far behind you and pinned too much across the chest, when the hands and club should stay in front of the chest. This error can cause some plane shift problems (e.g., laid off) and waywards shots. Also, a subtle bump into the left leg (weight shift) should be sandwiched between the torso turn back and through to help ensure an inside-out swing. Be aware of the tendency for the arms to collapse at the top; the arms should stop moving when the torso turn is complete; the arms should be relatively straight and tension-free; and the hands should be well away from your head, signifying a wide swing arc with no possibility of a collapse.

The turn away and back to and through the ball is accomplished by turning your torso. It is so often referred to by teachers and players as a shoulder turn, that many people believe that is the part of the body that should turn. This is confusing for new players and causes both new and experienced players to make the wrong move.

When you consciously think of making a shoulder turn, instead of rotating your torso, your move will be to force your left shoulder back. When you do that, your left shoulder comes up or flattens in golf terminology.

Quit Calling it the Shoulder Turn!

Mistakes occur when the hands or wrists initiate the first movement. Start to bring the club back using your torso and shoulders, not your wrists and forearms.

3 Keys for a Smooth Takeaway

The arms can be the culprits [of posture loss] if they initiate the swing by pulling the turn of the torso. The torso starts the backswing by rotating to the right, maintaining the address spine angle and the arms following.

Pinewild Country Club of Pinehurst

The first move away from the ball is absolutely essential. The hands, arms, stomach and chest must all turn together, as a unit. If you can't manage that, well, good luck, you've got very little chance to hit a good shot. But if you do manage it, you then have only to hinge the wrists and turn the shoulders to complete a perfect backswing. It's as simple as that. I've eliminated the complexity. I sincerely believe that anyone who masters these three easy backswing steps will have a rock-solid golf swing for life.

The Backswing - Nick Faldo

To turn more, you need to turn your torso during the backswing. As you swing back, try to turn your bellybutton 45 degrees to the right.

Backswing Shoulder Turn: How to Turn More

What is the pivot? The pivot is a blend of weight shift and a circular turning of the body. Or said another way, the pivot is both a lateral and a rotational movement of the hips, and the rotational movement of the torso and shoulders.

The Pivot and a Flat Left Wrist

One of the most confusing terms in golf instruction is "shoulder turn". Instructors that talk about shoulder turn to describe the amount of body turn during the backswing are hurting their students. What this means is if you start your backswing by pulling the club away with your hands, you may be hurting your swing right at the start of the backswing.

Instead of pulling the club away with your hands, push the club away with the turning of your chest. It will maintain the arms/body geometry and increase your chances of an on-center strike.

A Golf Backswing Mistake to Avoid

Early arm lift to line the left arm up with the turn and keep the hands in front of the chest…GOOD!!!!!!

[L] ate arm lift because the left arm is across the chest and the hands and club are way behind the turn…BAD!!!!

The left arm must lift

Getting the right shoulder over the right foot (lefts for lefties) helps you keep tilt behind the ball, gets you into position to have a shallow AoA [angle of attack] and no room for your arms to over run your turn.

Guess what…lag city.

Monte Scheinblum's Blog

So, summing up, for the production of power, a golfer should have a neutral (comfortably straight) spine at address. During the backswing, the thorax should rotate a lot relative to the hips; and the shoulders should rotate perpendicular to the spine angle which was set up at address. During the downswing, the spine should remain in its forward flexion, at least until impact, and the left hip should rise at that stage.

Anatomy of the Golf Swing – The Trunk/Torso

"While the arms do swing up and down and the wrists hinge and set, these motions are secondary to torso rotation," Parees said. "That is what creates the majority of speed in the swing."

PGA Golf Instructors | Golf Tips To Improve Your Golf Game

From a physics standpoint, a longer coil has more power, so in the back swing you might try to turn back from the mid-section to lengthen your torso coil rather than thinking of turning with only the shoulders.

Hip Sway in Golf - How to Add Club Head Speed

The term "shoulder turn" is misleading. You can easily make what looks like a full turn by pushing your left shoulder under your chin and lifting your right shoulder behind your head. That’s a full shoulder turn, isn’t it? Maybe, but it’s far from what you need to make a great golf swing.

What you really need to do is to make a full chest turn, turning your whole upper torso a full 90 degrees so that your back faces the target, and your sternum faces directly away from the target. When done correctly, this will create a high degree of separation (the "X-factor") between your hips and your shoulders, stretching the large, powerful muscles of your core, generating lag and putting you in the correct position to execute a fantastic transition and downswing sequence.

Drill 302. Backswing: Making a Full Shoulder Turn

Core Rotation: A big part of Sam’s [Snead] power comes from the core rotation of his body and flows through his arms and hands, down the shaft and into the clubhead. Shoulder turn? Yes, it’s important. However, without core rotation you’ve only got about 50 – 60 percent of your normal power. Imagine throwing a baseball without turning your core. Not much power there. Look at how far Sam turns his core especially in his hips.

5 Swing Keys to Consider in Sam Snead’s Swing – and Yours!

One of the more frequent mistakes I see golfers make is to stand up or lose their body angles through impact – the "stand and deliver" move! The loss of body angles or posture causes the body to stop rotating and as a result the hands now assume the responsibility of squaring the clubface. Remember – if the body does not rotate to clubface square, then the hands will help out. This move is very difficult to time, especially under pressure, and often leads to the hands overworking or flipping through impact. If the hands rotate the clubface too early the shot misses left and if they’re a touch late, then the shot misses right.

Hands Flipping

As you stand to the ball with the wrists slightly up, there is a straight line practically from the club head up the shaft and along your arm to the left shoulder, and as your hands are already waist high it needs only the inclining of the shoulders as we turn (on the pivot) to bring them shoulder high, without having altered their relative positions at all.

They [the arms] have not been lifted. They have gone up in response to the shoulder movement. This accounts for the curtailment and the control of the modern swing.

The Controlled Golf Swing

Finishing the backswing with a turn of the body, instead of a lifting of the arms, makes it easier to match up the timing and peak speed sequence of the arm swing and body rotation throughout the downswing to impact.

Golf Swing Synchronization

If the elbows bend, we shorten our radius and are not consistent with the position and length of our arms/club. Makes it much more difficult to return back to impact in the same position that we started (the goal). Also, elbow bending lends to "arm lifting". Having the arms take over and lift on their own, is the worst move for the golf swing. No power or repeatability. Lifting is a very weak move and the shoulders will stop rotating.

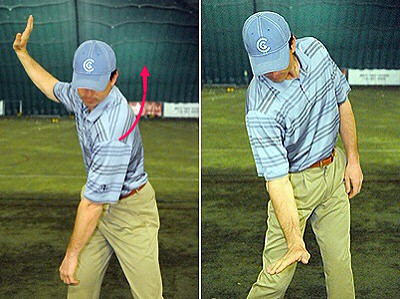
Move Less … Get Good!

Left Shoulder Lag Secret

Flipping. Casting. Club head throwaway. The opposites of lag. Not fun. Flipping ruins a good backswing and adds loft to clubs when we don't want to add loft; thus, we lose distance. The pros don't flip or cast; some of them look like they're barely swinging and hit a 7-iron 170 yards or more (think of languid, slow-rhythmed Freddy Couples and his Boom-Boom distance). They achieve this through physics...not strength or necessarily through some exclusive ability. The lagging club head is the key to effortless power. How does one stop the club head from catching up with the hands too early? For us amateur golfers, a little lag can go a long way, especially when we haven't had any.

The club head naturally wants to extend out to the furthest point from where it's being swung--the left shoulder. Yes, some instructors (e.g., Shawn Clement) argue that the swing center is the notch above the sternum, but when you're coming into impact, the right arm is still bent while the left is straight, so the club wants to seek an alignment with the left arm and left shoulder (i.e., the fulcrum of the club is actually the right wrist). For most hacker golfers like myself, this occurs too early--way behind the ball. We come through with the club head passing the hands to one extent or another (the more the flip, the worse the shot). So, we have been taught any number of silly things to counteract this--hold the lag, drag the mop, aiming point, etc.

Torso in the Downswing

For an industry that's struggling to grow, the Jedi Masters of the game need to stop holding back information, if they are, in fact, doing that on purpose. If hackers could learn the correct movements, they would all start lagging the club and handicaps would drop. But so would the number of lessons taken. It's not in a teaching professional's interest to give it all away early; one wonders if they don't have a need to keep things esoteric, vague, and mysterious--slowly giving up the real game-changing information, once a regular student has forked over enough dough. But I digress...forgive my conspiracy theorizing.

When the club head reaches the point where it is aligned with the left arm and left shoulder, the club head is moving its fastest; from that point onward, the club head is slowing down, no matter how hard you push with the right hand. For the flip to occur, something else must be slowing down too much. And I believe that's the left shoulder for most (i.e., the torso rotation is slowing or pausing). If the left shoulder keeps turning up and back before and after impact, and forward flexion over the ball is maintained, the club head CANNOT pass the hands early. Or, it's, at least, a lot harder to achieve.

Still images of pro swings fool us a bit; we usually only see these great swings from two views: DTL (down-the-line) or FO (face-on). We rarely see them from the target's perspective, and usually never from above, back-on, or from other angles. And swing sequences in magazines often omit images between "positions" that relay useful information, simply because they don't have the print space to show it all. There's a lot of missing information from which the careful observer could learn. At impact, we see a still image of shoulders that appear square to the target line, but that's just a brief moment located within the space of a second; the camera captures that moment, but we don't see that the shoulders (actually, the torso turning the shoulders), which began rotating briefly after the hips in the downswing, continue turning all the way through and past impact. They shouldn't tilt backwards. They shouldn't stop or slow down to stay parallel to the target line, forcing the arms out "to right field."

Slow motion video has, fortunately, removed some of the mystery, for those who observe closely. You will notice that the left shoulder keeps turning up and back, without pausing, though impact, when looking at the swing of a touring or good teaching professional. As the torso continues turning, there is a moment after impact when both shoulders are perpendicular to the target line, with the right shoulder lower than the left. Continuing the rotation into the finish position, the entire left side of the body is facing away from the target, with the left shoulder back towards the right foot, and the right shoulder is pointing target-ward and over the left foot. And the great player maintains their posture (forward flexion or "spine angle") over the ball into the finish--torso flexed towards the target line; they don't stand up out of their swing (i.e., sometimes distastefully called "goat humping").

Lightbulb! This is where you've heard the vague advice to move the left shoulder away from the chin as quickly as possible. It's one of those little tidbits that gets a brief mention but is never expounded upon very much. Sometimes it's those little tips or advice that are glossed over that have the biggest impact on changing your golf swing for the better.

This is also useful for chipping, as a chip is a smaller version of a pitch, which is a smaller version of the full swing; even the putting stroke has a minute bit of this movement. To keep the club head from passing the hands (i.e., flipping), the torso must continue turning while staying in forward flexion. Many chunked and thinned chips are caused by swinging the arms at the ball, overusing the wrists and elbows, and trying to keep the shoulders parallel to the target line through impact, which is what intuition tells you to do. Intuition and instinct in golf are usually wrong!

Now there's an inverse to this, obviously, since we're bilateral human beings. Just as the left shoulder continuously rotates counter-clockwise and up during the downswing, the right shoulder continuously rotates counter-clockwise and down--the reverse of the torso's backswing movement. After all, the torso is actually doing the turning, with the shoulders merely following. This is what teachers refer to as "firing the right side through," which is the antithesis of "clearing the left side."

Whether you think of it as continuously "clearing the left side" or continuously "firing the right side through," you must be shifted first into your left leg, left knee aligned over the left ankle. And you MUST maintain your posture (i.e., forward flexion) throughout--no standing up! See which swing thought gets you through the most and practice that one; you should immediately notice a more piercing ball flight, and your finish will have your shoulder line roughly parallel with the target line but mostly facing away from the target line!

The "feeling" of extending the left side of the body and elevating the left shoulder has been described by Brian Manzella (New Orleans golf instructor) as a "throwing a drunk off one's back" maneuver. Imagine being at a party and having a drunk partygoer draping himself over your left shoulder, and imagine the "feeling" of "throwing the drunk off one's back" by abruptly elevating the left shoulder in a sudden left shoulder shrug maneuver. If that left shoulder shrug maneuver is incorporated in a smooth manner into one's swing action, then it can produce smooth parametric acceleration of the hands/club without any need to "jump-up" after impact, and without any need to elevate the upper swing center.

Learning to perfect the i) timing of left shoulder socket elevation and ii) also the exact amount of upward movement of the left shoulder socket during the late downswing is an absolute requirement if a golfer wants to consistently strike the ball solidly with the sweetspot of the clubface.

Downswing

A golfer should ingrain the "feel" that the right shoulder is moving [down plane] at the same speed as the right elbow/RFFW (right forearm flying wedge) in the early downswing.

How to maximize wrist lag

The sustained rotation of the left shoulder is critical to squaring off the clubface at impact. [T]he beauty is you don’t have to think about pulling the grip up through impact. Swinging to a properly architected and balanced finish is the most simple and best means to keep the left shoulder ["to" removed] moving upward and rearward.

[In a balanced finish,] [t]he left shoulder should compress back towards the right heel and settle directly over the right heel.

WaddenGolf - Why the Finish to the Golf Swing is so Important

Here’s a secret golf tip Ernie El’s gives about the shoulders in the golf swing. At the start of your downswing, get the left shoulder moving away from your chin as soon as possible.

Perfect Golf Impact Position


Sunday, August 19, 2012

Correct Shoulder Plane

I posted previously about my whacky left shoulder hitch on the downswing. But I have flaws that have exacerbated that problem.

My shoulders usually turn properly on the backswing, with my left shoulder moving DOWN under my chin and my right shoulder moving UP behind me (i.e., shoulder line maintaining a perpendicular relationship to my original spine angle). Note that the left shoulder should not point down early or it can cause the upper body to tilt toward the target; the left shoulder move across before pointing down. (Updated 1 Mar 15)

However, in an attempt to aid hitting from the inside and avoid an OTT (over-the-top or outside-in) move, I've developed a habit of having my shoulders see-saw on the downswing. In other words, the shoulders have too much up-and-down, linear shoulder motion with little to no rotational movement.

Therefore, my shoulder plane was rotating back correctly but changing directions and becoming too vertical on the downswing. It was going too much down and not enough around. This is the identical problem that Tom Watson talks about in his Lessons of a Lifetime; his right shoulder moved too much under and not enough around; his ball flight errors were pushes off to the right. He fixed it by feeling like he was coming OTT compared to what he had done before. For Tom this amounted to his "secret." It was his eureka moment.

In reality, the correct shoulder plane has the left shoulder pointing down toward the target line on the backswing and right shoulder pointing down toward the ball on the downswing; think of hitting the ball with the right shoulder--some call this "covering the ball" with the right shoulder.

The key move is to feel like the right shoulder on the downswing REPLACES the left shoulder's backswing position and points DOWN at the ball. In other words, the right shoulder must move DOWN, FORWARD, AND OUT. Too much of either isn't good. Keeping the head back behind the ball while using this motion allows one to hit from the inside instead of coming OTT. If the head (and spine angle) shifts forward with the weight shift to the left leg, this shoulder move will cause the swing to be OTT.

Another feel to go after is that the right shoulder stays higher coming through the ball; in other words, the shoulders feel more like that turning level to the ground (in reality they aren't). This provides a shallowing effect to the swing, resulting in a swing that's flatter and more "rounded" as opposed to "up and down."

The correct finish will have the right shoulder pointing at the target; if it's trapped behind the left in any way then the swing went unfinished--a stuck swing.

It's important to note that this is a feeling. With a proper setup, backswing, and throughswing, the shoulders will be only slightly open at the moment of impact. Because of the continuity of the swing's motion, the ball will be just departing and then the right shoulder comes through powerfully.

At the top, think of replacing your left shoulder with your right. That will help you turn through while keeping your right shoulder under your head instead of spinning out in front of you.

The Turn Secret You Don't Know | GOLF.com

'MOVE THE RIGHT SHOULDER TOWARD THE BALL'

When I start down from the top, I try to feel as if my right shoulder goes directly to the ball, and this improves my swing path. Chuck also says this makes the body square the face at impact, which is more reliable than trying to do it with a lot of hand action.

Golf Instruction: Jason Dufner: Duf's Moves To Hit It Solid: Golf Digest

If the right shoulder comes down (rocks slightly) as it begins to turn, it brings the upper right arm against the right side and the swing starts down on an inside line.

It is when the shoulders turn, throwing the right shoulder high and out toward the ball, that the golf swing goes outside. Keeping the head back helps the slight rocking action which brings the right shoulder down.

Golf Downswing: Third Magic Move

If the head comes forward at this point, we lose the tension and get ourselves, in a manner of speaking, "over the ball" as we hit it.

If we keep the head back we do in truth stay back of the ball where we should be.

Golf Downswing: Second Magic Move

The head must be set back as the golfer reaches half way down to ensure the golfer attacks the ball on the correct inside swing path.

Head Angle in the Golf Swing Helps Dictate the Plane of the Swing | Suite101.com


Thursday, June 21, 2012

My Wacky Left Shoulder Hitch

I am occasionally vexed by a hideous hitch in my left shoulder. What happens is that my left shoulder joint sometimes rises slightly upward at address (tension) and increases during the down swing, which exaggerates my shoulder tilt and causes all sorts of crazy shots--fat, pop-ups (especially with the driver), and thin shots. I've noticed it can creep in to my swing when I'm nervous or trying to belt one.

Not sure why it happens but it may be an unconscious effort to lift the ball during the swing.

And I'm not 100% certain how to cure myself other than to be aware of it; it's a sign of tension in my swing and address position.


Monday, May 28, 2012

Posture and Setup

Here are some tricks I use to get a basic, fundamental setup:

  • Aim: Stand behind the ball to get aim line (starting line relative to the target); pick a spot on the ground a foot or so in front of the ball that's on the aim line--focus on that spot as you address the ball
  • Alignment: Take standing position on the side of the ball with club held out in front; align parallel to the line created by the ball and the spot you picked in the first step; back is straight
  • Stance: In general, set the left foot perpendicular to the target line and flare the right foot out slightly. Foot position can be adjusted to encourage ball flights but one should NEVER move the left foot from its address position during the swing
  • Posture: Unlock the Pelvis: Bend from the hips at address, such that the rear end protrudes SLIGHTLY to balance the torso; the pelvis should be inline with the torso. When the pelvis is locked, the pelvis is more inline with the legs, the back is in a C posture, and the body is already preset to stand up and lose the primary torso tilt, either going back or coming down. Don't go too far or you'll have the opposite problem with and S posture. If you feel unstable at address, check for this. The back is still straight; now bend the knees; arms should hang but shoulders should feel pulled back (if they droop the the upper back is drooping); this will look and feel as if you're establishing a tripod created by your legs and the club, and you will be looking in on your hands; another feel is that you're squatting to sit down on a stool (Updated 15 Jan 2015)
  • Posture: At address, the sternum or the middle of the chest will be pointing to the ground at a certain angle, pointing more down with short clubs and less down with long clubs. Note this position of the sternum, for it represents the "return cover angle" (the primary torso tilt or spine angle) of the chest needed during the downswing to maintain posture and hit the ball solidly (Updated 1 Dec 14)
  • Posture: Preset secondary axis or torso tilt by concentrating the weight onto the inside of the right foot and ticking the right knee in slightly; the upper body should then tilt slightly away from the target and the head should be preset behind the ball; this will allow for a centered pivot without swaying off the ball (Reverse K Position)
  • Set-up: Ensure that the elbows are straight, close together, pointed down, and in front of the torso; the upper arms should be somewhat across the top of the chest
  • Stance: Weight should be on heels at this point, so shift it slightly forward into the balls of the feet (mid-foot or arches)
  • Stance: Take small adjustment steps to align the club to the ball and target line
  • Set-up: (Ball position) Looking down at the hands and the ball at address, the hands should be, generally speaking, just in front of the ball for irons and just on top of or maybe slightly behind the ball for woods; the proper way to get the ball and hand position is with stance adjustments left or right (do not use the arms to get this hand position, i.e., forward press)
  • Alignment: Finally, ensure that the shoulder line is parallel to the knee, hip, and aim lines
  • Set-up: The belt buckle should be angled down toward the target/starting line, and the butt of the club should point at the belt buckle

My first typical error is to allow my pelvis to get into an un-protruded position, which fundamentally alters the posture and can lead to several errors, including thin and fat shots. A symptom that this is happening is that your shoulders will begin to droop and you will lose the feeling that the arms and club are hanging from the shoulders (i.e., the elbows and forearms may start touching the belly area, depending on your physical condition).

My second typical (and biggest) error is to leave my shoulders too level and turned slightly open, unconsciously aimed off to the left. This ironically FEELS right because the right hand is lower on the club and naturally pulls the right shoulder toward the aim line. But the correct position is such that the back of the left shoulder is slightly facing targetward; the correct FEEL for me is that the shoulders are aligned pointing slightly right, when in reality the shoulders are aligned parallel to the knees, hips, and aim line. Here's a test: set up in the correct posture holding a pitching wedge with the arms hanging. Now let go of the wedge and see where the arms hang. If they hang in the same plane the shoulder alignment is good; if the shoulder line is aimed too far left or right then the arms will hang unevenly. Turning the shoulders slightly rightward to improve alignment also gets the head behind the ball and automatically lowers the right shoulder.

My third typical error is to let my arms start bending and bowing slightly outward; my elbows separate and point outward instead of down.

My fourth typical error is to let the ball position relative to my swing center get too far forward, which, depending on the club face at impact, can cause pulls, pull-hooks, or slices. It's important to first "setup the crane and wrecking ball" and then "walk that crane into position," (Shawn Clement) such that the hands are just ahead of the ball for irons and either on top of or maybe slightly behind the ball for longer clubs (for driver, the ball isn't as far forward as you might think, especially for a draw). This works because the hands should be in the same position relative to the middle of the body for all clubs at address.

Along those lines, if you're losing shots to the right (i.e., straight-slicing, pushing or push-slicing), try moving the ball forward in your stance a few inches, especially with the driver, woods, and even the putter (Leadbetter). Keep in mind that this can exacerbate pulls and pull-hooks, so back off if that becomes the issue. (Updated 5 Aug 14)

Note that these setup steps don't account for unusual lies or stance adjustments for shot shape, so aspects may change for uphill, side hill, down hill, desired ball flights, etc.

Make sure you have a good knee bend and a nice bend from the hips. Your arms should hang down in your setup so there is a slight angle between your forearms and your golf club shaft. Your weight should be on the balls of your feet or towards the middle.

How To Achieve Perfect Posture On Every Golf Shot For Great Results | swingperfectgolfswing.com

1. Stand tall with a slight knee bend from the hips.

2. You should feel a pelvic tilt (butt out) with a flat back as you bend over.

3. Weight on the balls of your feet.

Good posture for good swings | Kandi Comer Golf

Once you are in this position stick your butt out. The reason for sticking your rear end out is to bring your center of gravity to a point over your arches.

With your weight in the middle of your feet you are in a dynamic position, you can swing the golf club to and fro and maintain good balance and that is the key to a good, solid, repeatable golf swing.

Butt Out - Play Better Golf

Chris DiMarco said his renewed golf swing is all in the butt. As in, sticking it out.

"My wife said, 'you used to stick your butt out like you were wearing a dress,'" DiMarco told the media after he fired a 68 in the first round at the Ballantine's Championship in South Korea. "It's amazing, the simplicity of it. Sure enough, that just kind of kicked everything right into gear and I have hit so many sold shots all week.

Tim McDonald: Chris DiMarco says golf swing is all in the rear | World Golf News

Often your stance can look and feel square to you but your hips and shoulders will be several degrees off line.

Instruction Tip #20 - Perfect Your Alignment

Point the butt of the club at your belt buckle and your belt line toward the ball.

"Belt line at the ball - Brian Manzella"

As we reach slightly lower with our right hand to grip the club, our right shoulder moves down and forward slightly and our right hip moves forward just a little bit.

Slight as they are, these movements "open" our body to the ball. You can see the effect more easily if you drop your right hand a foot down the shaft from the left.

The effect of this "opening" is threefold. It causes us to aim to the left, restricts our backswing and shoulder turn, and puts us in a position to hit from the outside in before we have even started the club back.

The Golf Stance Part 3: The Arms and The Open Position

Strive to keep your hands just SLIGHTLY ahead of the ball at address with all of your clubs. If you find you're pushing your shots you can bring them back to even with the ball. If your hands are really slow you can adjust them to just a tad "behind" the ball. No more.

Better Golf Address Fast and Easy

With the driver, most golfers play the ball too far forward and stand too far away from it. This might feel powerful, but it sets some bad things in motion.

Lesson Tee: Butch Harmon: Rule No. 1: Position The Ball: Golf Digest

The final step in our setup is to simply march over to the golf ball. From the setup position with the clubhead resting on the ground at the center of the stance, simply shuffle over to the ball while maintaining setup posture. Basically we create the setup while standing a few inches too far away from the ball, then slide the clubhead up behind the ball as the feet take a small step forward. We literally use the club as a yardstick to measure the body distance from the ball.

Golf Setup Lesson – Foundation for a Golf Swing

The hand position at address should be as close as possible to the position you want your hands to come into the ball at impact.

For an iron shot, where you need the club coming down into impact, you place the hands forward of the ball and in front of the club head so the shaft and left arm are in a straight line.

For a driver off the tee, where you need to hit the ball into the air, the hands should be opposite or even behind the ball slightly. The higher you want to hit the ball, the further behind the ball you have the hands when hitting off the tee.

Golf Address Hand Position - Stance Grip Tips | Suite101


Friday, April 20, 2012

Using Shoulder Turn to Fade or Draw

I've posted already about setups to hit the fade and draw and the D-Plane (which explains the ball flight laws). My big fall flight error (like most amateur golfers) is the slice. Sometimes I set up to hit a draw and still end up hitting a slight fade (works out okay sometimes), or sometimes I'll set up to hit a fade and it will become a slice. That tells me that I'm compounding the left-to-right ball flight with my setup. And I've done the same thing with the draw too--setup to hit a draw and then end up hooking the ball off the course. Unfortunately, there are times when I've set up to hit one and hit the opposite (I'd rather not talk about those times right now).

Recently I was hitting fairly straight tee shots with a slight fade and was trying to figure out why I couldn't hit the tight draw that I was hitting a few days before. Everything SEEMED the same, but it obviously wasn't. Then I hit on it: I was NOT turning my shoulders back fully to 90 degrees. I noticed that my left shoulder pointed in front of the ball at the top of my backswing, which was giving me a slight outside-in swing path. That path along with a square club face should produce a fade; if the face was open, it would produce a slice (basically a severe fade from which it's hard to recover). Anything used on top of that to exacerbate the outside-in swing path would produce a more severe fade or slice, even with a relatively square club face.

Golf is really about trying to diagnose and repair what's screwed up during a round, because it's easy to get lazy and let bad habits or old tendencies creep in without realizing it (e.g., partial shoulder turn, right leg straightening to much, not keeping the arms in front, etc.). If you're getting a slice, it can be a lot of things, but I know I have a tendency to get lazy with the shoulder turn (which can cause a laid-off position at the top). I have a tendency to let the arms get too much across my chest (too inside leading to outside-in), and I have a tendency to get too handsy with my takeaway (too inside on the backswing that can lead to OTT).

The reason it's tough to diagnose why one might be fading, slicing, hooking, pulling, pushing, or drawing when it's not intended is that ball flights are a marriage between swing path and face at impact. If you KNOW your path is inside-out but you're push-slicing then you have an open club face. I believe this was more my issue when I first started golf--I simply was blocking the club face open and would often end up with a push-slice. Sometimes (unless you're really paying attention to yourself compared against the fundamentals), you may have trouble diagnosing what you're doing wrong.

Given that I noticed (this time) that I wasn't getting my back to the target at the top, I hit on the idea of using a variable shoulder turn to try to hit cuts, straight, and draws, especially since the traditional setup ideas to hit them usually give me severe slices and hooks instead of the intended flights. What if I simply used less shoulder turn for a fade and more for a draw? Then I could aim left of my intended target and hit the fade and vice versa for the draw. I wouldn't have to worry about all the other aspects of hitting fades and draws. If you think about it, it's the equivalent of opening or closing the stance to hit a fade or draw, but adjusting the stance requires the same full turn on both.

Here's something to try: To hit a fade, try turning the shoulders so that the left shoulder points in front of the ball at the top (from your perspective looking down); you shouldn't be able to see your left foot because your left shoulder will be shielding it from view. For a draw, turn more fully so that the left shoulder points behind the ball and covers the right foot from view. A straighter ball will be somewhere in between. Don't do anything else differently (except for where you aim)…use the same grip, square stance, takeaway, and ball position. The point here is to manipulate only one variable: swing path (and to do so as simply as possible).


Saturday, March 17, 2012

The Rope Drill

This is an old (but great drill) that can help take the "hit" out of a golf swing and make it a "swing."

Here's a drill you should try.

Get yourself a piece of rope about 42" long and 1"thick.
Take a normal grip, take it to the top of your swing and let the rope rest on the top of your shoulder. As you start down with your lower body "feel" like the rope stays on your shoulder as your hands head toward the ball. Let the momentum of the rope finish the swing. By allowing the rope to lag behind, you'll sense what it's like to draw the club like "the arrow out of the quiver".

You will also note that in order to accelerate the rope, you will have to pivot properly and pull it lengthwise, it's almost impossible to come over the top.

[From Gotham Golf Blog: The Rope and The Pivot]

If you are using your core properly the rope will wrap around your body smoothly at the end of your back swing, straighten out at the bottom of your swing and re-wrap around your body during your follow through.

If your swing is all arms the rope will be "whippy," it will be moving all over the place, and it will slap you hard on the back. This is how you know that you are not effectively swinging and using your core.

It's like a shock collar for your swing. If your swing is all arms you will find out quickly and want to fix it as soon as possible.

The easiest place to see this is in the very beginning of your swing. Never initiate your swing with your hands. If you are doing this the end of the rope won't move at first when you cock your wrists. This is bad.

[From Stop Leaking Power From Your Golf Swing Using This Weird Trick]

Saturday, February 25, 2012

Golf's Triangles

Another way to consider the motion of the arms in the golf swing is to think of the triangle formed by your arms at address. This swing thought can be used to help prevent getting laid off or across the line at the top, preserving the correct swing plane, and it can also aid extension back and through. Finally, it's absolutely critical for a proper takeaway.Takeaway Triangle

It's important to note that the triangle stays in front of the body or chest all the way through the swing, and it can even be used for short game shots. The sides of the triangle near the base (your upper arms) should stay connected to the sides of your chest.

Using this triangle swing thought keeps the elbows related to the hips, especially the right elbow to the right hip, and helps maintain the swing radius. It's important on the backswing to remember that the right leg stays bent to get the full benefit from the triangle.

Simply form the triangle at address, lift the triangle vertically on the backswing (as if it swings around your neck) by rotating the shoulders (the right elbow naturally folds as it rises); allow the triangle to lower on the downswing using hip rotation, and allow it to lift vertically on the through swing. The triangle stays in front of the body the entire time; the triangle does not become "horizontal" or more parallel to the ground until you reach the top (going back in the takeaway, it should feel vertical, with right arm above the left). A full 90-degree shoulder turn is essential to using the triangle correctly, with the right shoulder pulling the triangle into position at the top.

During the takeaway, the right arm should remain straight for as long as possible, and it will initially stay above the left arm, as mentioned above. This will help keep the club head outside the hands during the takeaway, which is key to avoiding an OTT downswing. When the right arm finally does fold up, the right elbow should be pointing down at the ground--not behind the golfer (both elbows should stay relatively close together--as close as possible to the distance they were at address). Separating the elbows at the top is a major flaw that can lead to the arms collapsing, and it's a sign that the arms are doing more than merely moving vertically.

The movement of the shoulders is key; the triangle in the takeaway moves in response to the right shoulder pulling back and up behind the golfer, while the left shoulder tilts down. The right palm faces down toward the target line during the takeaway, such that the club face angle matches the spine angle. The arms, wrists, and elbows do very little to get the club back, but the arms rise vertically to get the club up.

The raising and lowering of this triangle (along with wrist action) constitutes the upward and downward motion of the golf swing, while hip rotation (and associated shoulder rotation) constitutes the horizontal, circular motion of the swing. At no time should the arms pull the club back behind the body; the correct feeling is a lifting up-and-down in front of the body without much independent arm movement.

Martin Hall has criticized this "triangle thought" because the arms don't actually maintain perfect triangles throughout. Instead, he argues for keeping your arm extension. Don't let this deter you. As with anything in golf: If it helps you then USE IT! Yes, we're not talking perfect triangles (the elbows do bend) but you get the point.

The triangle concept perfectly illustrates the takeaway. The butt end of the club should point roughly at the belt buckle during the takeaway (before the arms begin rising). If you're used to quickly pulling the club inside with your hands then this will feel really weird and wrong--as if you're outside the target line. But you're not! You're keeping the club head OUTSIDE your hands until the correct moment in the backswing by maintaining this triangle and keeping the butt end of the club pointing at your belt buckle in the takeaway. You've heard that the pitch shot is actually an abbreviated full swing; I think the pitch shot is either the takeaway or just beyond it with a little bit of wrist action!

However, there is ANOTHER triangle worth mentioning: the so-called "eternal" or "magic" triangle, formed by the angle of the left arm, club shaft, and an imaginary line from the left shoulder to the club face. The longer this triangle is maintained, the greater the lag. However, the first triangle we discussed is really the key to the "eternal" triangle. Not surprisingly, this also is the "L shape" of the left arm to club and Ernie Els' "maintained box" shape (he focuses more on the angles of the right arm to the club as opposed to the left). Keeping these angles ensures the use of the joints as levers (as in physics), which produces maximum lag and energy transfer.

Here is a quick drill: Hold the club straight out in front of you and extend your arms out as far as they can. This should create a TRIANGLE between your chest and your hands. This triangle is the key to a consistent golf shot. We want to keep this triangle formed throught the entire swing.

[From Golf Swing Plane Tips: How To Develop The Perfect Golf Swing]

Take the triangle you form between your arms at the top of your swing and pump it up and down to waist high. Get the feeling that your right elbow grazes against your right hip. Don't jam it into your hip. Just make sure it connects in some way. Also, stand in front of a mirror and watch for the gap. When your right elbow grazes your right hip, you should see some space (daylight) between your forearms. If you see this, you are coming from the inside, and on your way to playing good golf.

[From Golf Tips - Lessons from the Golf Pros - The Magic Gap]

You can also imagine a triangle, formed on two sides by the shaft of the club and the left arm, with the third side an imaginary line from the club head to the point of the left shoulder. From the top this triangle must be tilted and brought down a ways without changing the length of the imaginary side.

This we call the "eternal triangle," because it must be retained as long as possible. As the speed of the golf club head increases, the imaginary side of the triangle lengthens, of course, and the arm-shaft angle starts to open up. But the triangle should be kept constant as long as possible.

[From Golf Downswing: Third Magic Move]

A one-piece takeaway also keeps your hands in front of you. Note that [Lucas Glover's] hands are still pretty much in front of his belt buckle, even though his wrists have begun to cock. (In case you're having trouble seeing it, the clubhead is just to the left of his elbow.)

Ruthless Golf: More Thoughts on Keeping Your Hands in Front of You

1. Grip Points to Belt Buckle...To ensure correct hand height, the butt of the club should point at your belt buckle at address.

2. Clubface Points at Ball...One useful checkpoint is to see that your clubface is pointing at the ball as you swing the club back (right). This will head off two Common errors: fanning the clubface open so it points at the sky, or holding it closed so it points down at the ground. Either mistake forces you to become handsy if you hope to return the club back to square at impact.

3. Wrist Cock Blends with Turn...When your wrists begin cocking up, they should blend with your turn to keep the club on plane. You can check this by stopping your backswing when the shaft is parallel to the ground.

Three 'Musts' for a Smooth Takeaway | Instruction Feature | PGA.com

When I ask amateurs to show me how they start back, most will move the club away with only their hands and arms. What I want to see is the hands and arms moving in sequence with the rotation of the upper torso. All three should move together as one unit until the left arm gets parallel to the ground--at that point the swing's momentum will keep the hands and arms on plane.

Sean Foley: Simple Swing Fixes: Golf Digest

A couple of things to notice in these photos: the shape of the triangle that she [Annika Sorenstam] keeps with her arms and chest, the way that the club head stays in the center of that triangle (in other words, no early wrist cock), and the way that her right arm stays above the left arm all the way to waist high.

The Takeaway: A Common Fault and Fix | Three Guys Golf

Notice how the upper part of my left arm is still attached to my chest, while the clubhead is outside my hands as the club has traveled about halfway back. My left wrist is still cupped, my right arm is above the left and my right knee is still flexed. These positions, though simple, are absolutely critical.

50 Best Swing Keys | GolfTipsMag.com

Compare any of the greats in history and pause the video on the DTL view when the shoulders have rotated roughly 45* you will notice all of them have the triangle at that point between their chest and arms regardless of lift of the arms or rotation only. If the left arm looks higher then the right arm at a 45* shoulder turn then likely that person has come away inside and very flat.

So it is more about arms and chest working away from the ball as a single unit not really the right elbow staying close to the body, if you look at a face on view you will see most golfers that right elbow when the shoulders get turned 45* is actually a pretty good distance from the body.

Right elbow is the key

A good way to take the club away from the ball as straight as possible without swinging the club overly outside or inside the target line is to focus on keeping the right forearm staying above the left during the takeaway. Even if you try to keep your right arm on top of the left on the backswing, it will automatically move under the left arm at the proper moment as you swing the club to the top. As your backswing continues toward its top, your right arm should start to fold at the end of the takeaway and move under your left.

Keep right forearm above the left

Simply put: The right arm should be on top of the left arm as you start the backswing, and then it should move under the left arm as you swing the club to the top.

Many amateurs fold and shorten the right arm too early as they snatch the club away. What you really want is a relatively straight right arm during the initial part of the backswing as this promotes width and good pace -- keys to hitting solid shots.

David Leadbetter: Move Your Right Arm The Right Way : Golf Digest

Most golfers ruin any chance of hitting consistent golf shots within the first 6 inches of the golf swing takeaway.

The first takeaway mistake that I see most often is for the golfer to hinge the right wrist early or bow the left wrist (often, both are done together). Simply hinging the right wrist 45 degrees will move the club about 3 feet without the body having to move an inch.

The other common golf swing takeaway mistake is pushing the golf club back predominantly with the left arm and shoulder.

This is typically coupled with early right elbow flexion (i.e., bending), which should not occur until the takeaway is completed. In other words, the right arm should remain completely straight until the club is past parallel to the ground.

Learn the Perfect Golf Swing Takeaway in 5 Minutes per Day - Online Golf Instruction

The right arms should stay “above” the left as you move the club away from the ball with the palm of your right hand pointing at the ball. This will keep the clubhead outside your hands and stop you from fanning the face open. When the club gets to parallel to the ground during the takeaway the clubhead should still be slightly outside your hands with the clubface parallel to the outside of your right arm.

Top 100 Teachers: Ask Brady Riggs Live! Golf Magazine Top 100 Teacher Will Fix Your Faults

Notice Nick Price’s right forearm and how it is comfortably above the left. This is all accomplished by pivoting the shoulders on a fairly steep plane. The higher the right shoulder, the higher the right forearm and so on…

In a correct pivot, the left shoulder’s first move is down and then slightly across. This is in direct contrast to what most golfers attempt to do with their shoulders, which is: a. turn them as much as they can and b. get the left shoulder behind the ball.

The Shoulder Pivot in the Golf Swing | Andrew Rice Golf


Sunday, February 19, 2012

My Golf Lesson: Laid Off

I recently took some online video lessons with famed teaching professional Bobby Eldridge out in AZ. I highly recommend giving Bobby a shout; he's very good!

To my surprise, Bobby immediately picked up on something I hadn't considered: I was too laid off at the top. In other words, my club shaft pointed well left of the target line instead of more parallel to my target line. This move was causing my pulls, pull hooks, deep divots, and slices, because one unconsciously corrects for this by coming over the top (OTT). This is something that is hotly debated among golfers and professionals, as there have been many great golfers who appear 'laid off' at the top of their swings. Ben Hogan has even been accused of this sin. For clarity, the opposite of being laid off is being across the line, meaning the club shaft points right of the target at the top, and this move supposedly leads to hooks and coming too much from the inside.

It's also important to note that having the club point left of the target doesn't necessarily mean that one is "laid off" in the negative sense. What's important is being "on plane." When you're on plane it's not neccessary to get the club to parallel (reference Hank Haney's 7-Steps book). A better description of being "laid off" is a swing plane that is too flat, regardless of where the club points at the top.

Bobby didn't think so, but from my previous Hank Haney online lesson, I know that I have failed in the past to get a full 90 degree shoulder turn; this can contribute to a laid off backswing. It's easy to comprehend that an incomplete shoulder turn will cause the club to point left at the top.

Now, what I'm describing flies in the face of a reversed loop swing that I've championed before; let's face it, a reversed loop swing is a correction (i.e., defeating a steep backswing with a shallow downswing). It works well for some professional golfers with impeccable timing, and it helped me too (for a while). But because it's a correction and requires timing, it's not easy to do (for me anyway).

As I'm a mere mortal (beginning golfer), how much better would it be if I could keep the club on plane all the way through? This is what Bobby was getting at with my backswing. The correct feeling has more to do with the arms and club staying in front of the chest, back and through. For me, it feels very vertical, but it definitely agrees with Shawn Clement's commentary on the arms "falling down the plane." It seems easier to hold the lag and allow the arcing motion of the club shaft to happen late (more due to arm rotation than shoulder rotation), thereby producing an inside-out club head motion. When I swing down this way, I focus on the inside of the ball, as if that's where I'm trying to hit it (the only way to do that is by this arcing motion with retained lag). Extension back and through seems more natural as well, and a 90 degree shoulder turn is important to get the club pointing down the target line (without the arms collapsing). And as you can see from Clement's explanation, the right elbow-right hip relationship is important too, with the right elbow falling down IN FRONT of the hip--not attaching or crashing into the side of the hip. The hips must rotate to shallow out the vertical motion.

One should feel as if one is pointing the club shaft at the target at the top of the backswing; if the club points to the left of the target, it will be too laid off, which can cause nasty slices and pulls on the way down, depending on the corrections one makes in the downswing. Here are some tests to determine whether one is laid off at the top:

Take a full backswing but stop at the top of your swing. Simply loosen your grip and allow the club to fall on you. If the club is on plane correctly, it should fall on the tip of your right shoulder. If the club falls too much toward your neck or head, your plane is too steep. If the club falls below your shoulder, your swing path is too laid off or flat.

[From Golf Swing Plane Tips]

Wherever your eyes are looking, your hands and the clubhead will want to go. If your eyes are looking at the back of the ball at address, then you are probably trying to square the clubface to the back of the ball at impact. Address and impact are two very different alignments in golf. Focus your eyes on the inside quadrant of the ball at address and your hands will strive to reach your new focal point. By making this small change, you will be well on your way to improving your downswing and obtaining much more manageable misses.

[From Classic Swing Golf School]

Following the takeaway, focus on folding the right elbow up, not out behind you. Your swing should feel much more vertical than before. More importantly, it should feel shorter. That’s a good thing since, whether you believe it or not, a good backswing is only 18 inches long. From setup to the top, your right elbow should move just about a foot and a half, from the center of your torso to just outside the right hip.

[From Golf Tips - Elbow Room]

The key is we have to fight this by trying to keep the shaft as vertical as we can in the transition and down to impact. If we let the shaft fall back it will lay off as much as parallel to the ground or more and also fall more inside. This will cause getting trapped behind the body approaching the ball, causing a big inside out swing path that will hit big blocks. To stop the blocks, big time over rotation of the arms hits big pulls.

[From Laid off at the top of the Backswing…Cures, Tests and Drills - Surge's Daily Golf Swing Tips]

One classic problem is leaving the club pointing left at the top or as we call it laid off. This can be caused by an inability or unwillingness to complete the turn on the back swing. If you only turn your shoulders 45 degrees instead of the preferred 90 degrees, the club will likely be 45 degrees left of target, a major cause of the classic pull or slice swing. Even players who typically do it correctly on the range may find that the tension of the golf course prevents them from completing the back swing and causing an improper path.

[From Club Position]

Think of yourself as a righthanded batter, with a golf ball sitting on home plate. As you move into impact, try to sling the clubhead toward right centerfield. Approaching the ball from inside the target line like this—as opposed to down the target line when you try to hit the back of the ball—relates the shallow arc necessary to make centered contact and compress the ball so it shoots off your clubface like a rocket. At impact, your clubface should strike the lower-left quadrant (the one closest to you) of the ball.

[From How to Max Out your Irons | GOLF.com]

When you reach the top of your backswing, allow your hands to drop the club straight down. If the shaft hits your shoulder, then great—you’re on plane. If the shaft missed your body and the clubhead falls behind you, you’re probably laying off too much and you need to keep your hands and shaft above your shoulder in order to get back on track.

[From No Layoffs! | GolfTipsMag.com]


Tuesday, January 24, 2012

Reverse the Loop

I recently took a few online video lessons with Hank Haney's cadre of instructors and learned some really good information. First (probably left over from my S&T days), I tended to be a little upright in my swing plane and I took the club inside, which caused a slight over-the-top move with an opening club face through impact and a nasty push-slice. Yes, I managed to get some in-to-out motion occasionally with that steeper inside swing and occasionally drew the ball as I intended, but I also hit more than my share of straight-slices, pushes, push-slices, and even pull hooks. Why the hooks? Because in addition to trying to force in-to-out motion using a steep approach, I was having to make manipulations with my hands and forearms to try to square the club face (or use a stronger grip which doesn't feel natural to me). When I didn't hit the ball fat, my divots on the target side of the ball were always DEEP…too deep, starting shallow but ending an inch or two down into the turf.

I knew about all of the positions I was told I should be in, and I would always get confused by the instructors who would contradict each other--some saying those positions happened naturally and some saying they had to be conscious thoughts. You've heard about these positions and characteristics of a good swing before (i.e., flat left wrist at impact, rolling forearms, retained lag, foreword leaning shaft, retracing the backswing plane with the downswing plane, etc.).

So, during a recent 9-hole practice round, I decided to copy some advice I heard Hank Haney give several of his famous pupils on The Haney Project who suffered from some of my identical mistakes: Learn to reverse the OTT loop--take the club back slightly OUTSIDE the line and then come UNDER the plane with the club head on the downswing. This move gets the golfer approaching more naturally from the inside on a shallower downswing plane. The feeling that I had was that my hands and right elbow were dropping towards my right hip with the hips leading (the club dropping slightly behind me and flattening); the club made a shallow arc when in the vicinity of the ball. I could feel slight tension in my grip and left forearm, as it rotated and squared the club into impact; the feeling I could best associate with this is like closing a gate with the back of my left arm. The club stayed in the middle of my body, even into the followthrough. My divots shallowed out and my contact was better. I was drawing my 3-hybrid and 4-iron and the ball was launched on line!!! And the real test? I left with the same two balls with which I started! I usually push-sliced the devil out of that 4-iron, sometimes ending up 30 yards right of my target or out of bounds. Let's not even discuss the driver, which I would usually push, push-slice, or hook into trouble. Occasionally, I would get a low draw that would put me in the fairway, but with no real distance.

In reality, what's causing the hands and elbow to drop towards the right hip is FEELING THE WEIGHT OF THE CLUB HEAD FALLING BEHIND ME, making a loop (see Jim McClean's video below on the slot swing). And all of this means that the RIGHT SHOULDER IS ACTUALLY DIPPING DOWN while the back is still turned to the ball. All of this creates a Figure-8 oval shape with the club head. Keeping a loose grip at this stage of the swing really helps to feel the weight of the club head, and this also means that the transition from backswing to downswing feels more continuous (i.e., no real pause in the motion).

I also should add another important point I got from my online lesson; the instructor noticed that I set my wrists late and suggested that I set them earlier to increase my lag. So I work to set my wrists once the club passes above my waist, and this seems to work really great along with dropping the club head and reversing the loop. Also important: 90-deg shoulder turn. Getting a full 90-deg really helps with getting an inside swing path (in a sense, it helps automate the loop).

I have focused on this halfway-back position via what's become known as an 'early wrist set'. It's quite simple: I look for my wrists to be fully hinged and the club 'set' up on a good plane by the time my left arm is at horizontal.

[From How to plug in a repeating swing - Nick Faldo]

Bobby Jones in his book Bobby Jones on Golf had similar advice on bringing the right elbow in close and keeping the wrists set:

BJonGolf

If you look around on the internet long enough, you'll see this theme repeat over and over:

Start the downswing by stepping down on your left heel and letting your left hip move slightly toward the target. As your lower body starts to move, pull your hands down, keeping your right elbow close to your right hip as long as possible.

[From Take our advice: Put your golf slice in the past]

Jim McClean calls this the Slot Swing:

Here's a drill from Jeff Ritter that uses the waggle to prep the body to hit a looping swing ("…your slice will be gone forever.")

So, after that wonderful practice round, I decided to do some research on the subject and found Bradley Hughes--a retired golf professional from Australia who now teaches in South Carolina. Hank Haney's teaching differs from Hughes in so many areas, but in this one area--the reversed loop 2-plane swing--they seem to agree. And the common thread seems to be a universally admired golfing hero--Ben Hogan. Both Haney and Hughes admire Hogan and incorporate his teachings to various degrees (Hughes more so). Whereas Haney seems to gravitate towards this approach as a last ditch effort, Hughes seems to embrace it as the only way to swing.

Hogan (and many of the professional golfers preceding him and following him up until the 1990s or so) swung the golf club this old way. Even Tiger swung this way in the beginning, using the older wooden clubs with flatter lie angles. Hogan was so flat coming down that many 'experts' criticized him as being laid off. Jim Furyk receive the same criticism. But Hogan's results are undeniable, and many of the professionals who swung like him coming down were also consistent greats, including Jack Nicklaus--the greatest of all time based on results. I'm not talking about their backswings, which are irrelevant according to Hughes. Nicklaus was fairly upright on the backswing. Consider Jim Furyk's backswing--it's nearly vertical, but he loops, drops his hands and right elbow to his waist coming down, and hits a nice, shallow, powerful ball, and then ends with a high finish (no pushing the upper left into the chest on the followthrough--the so called "connected" finish). He and Sergio Garcia are two examples of the few modern professionals who still swing the old way but get criticized for it, unfortunately. If Garcia could putt better (and he's working on that), he would be one of the best EVER! In some cases (like with Garcia) it's hard to notice by looking only at the hands and right elbow (pay attention to the club head).

And low and behold, several other positive benefits happen, according to Hughes. The flat left wrist, bent right wrist, lag, forward shaft lean, head behind ball, bent knees, and so on all happen naturally when using this downswing. No artificial rolling of the arms or flipping the wrists is necessary to square the face. Hughes says to forget the backswing and grip--so many differences in those fundamentals among players that they should not be considered fundamentals. The impact area is the only true fundamental.

The cherished ball strikers of days gone by (see below) all had the common theme of retaining their knee flex....and swinging on a shallower plane into impact....which allowed the right arm to stay quieter UNTIL well after impact.

This bred the consistency of their ball striking and allowed them to play much more flawless, easier hassle free golf without having to conjure up miracle shots and have to hole 25 foot putts on every green to salvage a score.

[From BradleyHughesGolf.com | Page 8]

Still not convinced? Look at these videos and articles (there are MANY others):
Brad Redding: Reverse Your Loop
Fire Your Lower Body
Haney to Romano: Reverse the Loop!
If You Slice, Read This
How to Fix an Outside Swing in Golf
Over the Top Golf Swing
How to Fix Your Golf Slice
Learn From Sean O'Hair's Downswing Loop
10-Yard Guarantee: Right Elbow, Right Hip
Drop the Hands to Hit Inside-Out (my previous blog post on the subject)

Sunday, January 22, 2012

Drop the Hands to Hit Inside-Out

My main ball flight mistake is a push-slice. Video analysis shows that I pull the club too much inside and then swing just slightly over the top on the downswing and with the club face open slightly (or even maybe opening because of the motion). It's easy to see when the blur of the club is cutting across the ball. Try it as a drill or notice your practice swing.

The easiest way to swing the club without effort is to simply let gravity do it for you with maybe a little assistance to get some "oomph!" How? From the top of the backswing, simply drop the club and arms while the back is still turned, while simultaneously rotating the left hip backwards. This will stop the over the top move and result in a nice, relaxed, languid swing. The body will naturally react to this falling motion to prevent the arms from crashing into the body; Shawn Clement is a big proponent of this, as are many other teaching professionals.

The feeling I have is that I lift my arms straight up in front of my chest while turning fully (back facing the target), get to the top, and then drop my arms and hands while my back is still turned while also immediately rotating the left hip targetwards and backwards (again, the back is still turned); from there everything just happens automatically. This creates a tremendous "X factor," where the hips are open while the shoulders are still mostly closed (an X shape is formed due to the difference between the hips and shoulders). There's no flipping of the wrists; the left forearm turns so that the back of the left hand is flat and "slapping a wall" or "closing a gate." The pivot is driving the motion as the club "falls"--closing the club face while also approaching the ball from the inside. The blur of the club face feels flatter to the ground and appears more circular (less linear), such that the blur approaches the ball from the left-rear (the inside).

Two additional important points: The grip should be slightly loose but firm enough to rotate the club. AND turning the shoulders a full 90 degrees (back to target) will allow for an easier inside move.

This move gets the right elbow in front of the right hip coming down, a key position seen in almost every professional.

Another way this feel has been described is "swinging to right field." This is a baseball analogy (that isn't exactly true) but it ingrains the feel of a proper inside-out downswing.

This reverse looping action--often called "dropping the hands into the slot"--is taught by Hank Haney and many other professionals, including Bradley Hughes. But in reality, it's a classic way of swinging that has fallen out of favor with todays upright swingers. Ben Hogan made this two-plane approach famous.

Here's Bradley Hughes on Hogan's swing:

It's easy to see from Hughes' analysis of Hogan's swing that Hogan did a lot of great things, including keeping the club and arms in front of his body all the way through. He also used his pivot to square the club face rather than relying on an artificial rolling of the forearms. Keep in mind that Hogan fought a hook, whereas most of us fight slices; therefore, an overly active lower body is a great way for hookers to straighten out their shots and even start hitting fades, which is what Hogan did using the torque of his lower body. Slicers (like me), however, need more active arms and less body (hence…drop the arms while turning the left hip back). Too much lower body motion for a slicer will only make a slice worse (Haney).

Most amateurs try to help the club toward the ball by pulling on it from the top of the swing. They are, in effect, trying to help gravity—one of the greatest forces in the world. Mother Nature doesn’t need your help. She’ll get it done—if you don’t pull on the club.

When you’re at the top of the backswing in good balance, you literally let (key word even if it’s small) your arms drop through space as you turn your hips left and get your weight onto your left heel at the completion of what’s a lateral turn.

[From Golf Tips - The Fire Drill]

Wherever your eyes are looking, your hands and the clubhead will want to go. If your eyes are looking at the back of the ball at address, then you are probably trying to square the clubface to the back of the ball at impact. Address and impact are two very different alignments in golf. Focus your eyes on the inside quadrant of the ball at address and your hands will strive to reach your new focal point. By making this small change, you will be well on your way to improving your downswing and obtaining much more manageable misses.

[From Classic Swing Golf School]

Upon reaching the top of the backswing, simply allow the arms to fall vertically. The shoulders must be relaxed and the arms must feel light. This motion is dependent upon gravity, as well as, the golfer permitting the arms to drop from the top. This will allow the club to fall in the slot. With this technique, the golfer must resist the urge to work the club out to the ball. The outward action of the clubhead results from body rotation, therefore, the arms must fall from the top of the backswing before any rotation of the body begins.

[From Classic Swing Golf School]

Butch and I [Tiger Woods] worked hard on my first move down--letting my arms fall as my weight transfers to the left, and keeping the club more in front of my chest instead of behind me. When you see me make that little drop move with an air club, it's a reminder of that first move down. The lesson for you: Start the downswing by letting your arms drop as your weight shifts targetward.

[From The lessons I've learned: And what you can learn from them - golf swing techniques; managing a career in golf | Golf Digest | Find Articles]

From the top of the swing, the arms and hands are passive, essentially in free fall. As the club lowers to waist height, the feeling is that the right elbow drops in and the left arm is extended.

[From Breaking 100-90-80: A monthly guide to the scoring basics - golf tips | Golf Digest | Find Articles]

"The farther you line up left of your target, the farther you'll hit it to the right. With that being said, you've almost got to feel like you're swinging toward right field and putting some hook spin on your ball." ~Zach Johnson, PGA Touring Pro

[From Never Slice Again - Golf.com | GOLF.com]