Showing posts with label turn. Show all posts

Saturday, January 4, 2014

Torso Turn

You know...I've made several faux pas on this blog, and if you read through carefully, you'll no doubt find contradictions and errors (because golf instruction is full of contradictions and disagreements), and I've fallen prey to my fair share of fixes and tips, only to change my mind about them later. Remember, the ultimate purpose of this blog was to document my discoveries and breakthroughs, and some of those, unfortunately, turn out to be dead-ends (though some of them may not be dead-ends for you).
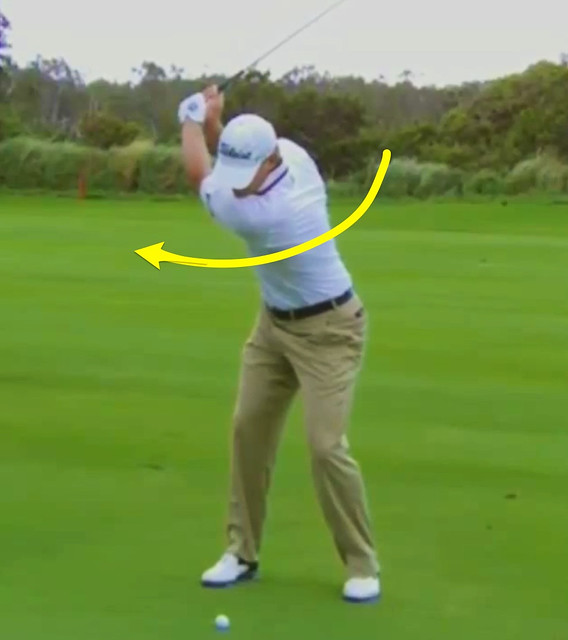
Torso Turn in Backswing
Torso Turn in the Backswing

But here's something I've stated a lot on this blog in numerous posts: "shoulder turn." What's the big deal? They turn, right? Well, yes. But we have to be careful, because each shoulder is capable of independent movement with respect to the torso (the rib cage and abdomen). The hips can also make a good deal of movement. The mid-spine (thoracic) and high-spine (cervical) have a wide range of rotation, while the lower spine (lumbar) is mostly limited to up-down movements. Yes, it's possible for you to FAKE a good turn by moving your arms, hips, and shoulder joints. This fake turn doesn't feature a lot of mid-torso movement, which is what we actually need. In other words, the mid-spine should turn the most, with the hips turning to complete the turn. The shoulders and arms MOSTLY go along for the ride.

Henceforth, when you read this blog and see the phrase "shoulder turn," please understand this is really synonymous--and actually more correctly descriptive--with an upper "torso turn." Is it a big deal? Yes. Because the shoulders will turn PASSIVELY when the chest and abdomen rotate back and through. Those muscles in the ribcage, back, and abdomen are the ones to focus on when conducting the takeaway, backswing, downswing, and finish. The shoulders, arms, wrists, and hands (and thus club) just go along for the ride MOSTLY (see gotchas below); there's no real need to consciously move them.

Actually, with just a torso turn, the arms are automatically brought to chest height during the takeaway. All that's necessary for the full arm motion from that point onward is a lift of the hands and club that amounts to about six inches of vertical movement above their address position! The torso turn provides the in, back, and up motion for the arms (i.e., depth), while a slight lift due to the right elbow bending provides the remaining up (i.e., width); no more is needed because of the posture (left shoulder low, right shoulder high). Yes, the arms lift, actually, very little in the backswing, and they DO NOT pull the body back at all! They merely lift up slightly. The hands should feel very wide and far away from your head and shoulders, but there should be no tension in getting there: Swing the hands away wide using your torso and let your arms stop moving when your torso stops turning!

I love to think of the torso as a large cylinder that juts out at an angle from a bulky bipod (legs). Using that analogy, it's much like a large reflecting telescope, pointing approximately 45-degrees into the sky (i.e., forward flexion or spine angle), sitting on a two-legged stand. Now for the backswing and downswing motion, just think of the telescope cylinder itself rotating IN-PLACE clockwise (back) and counter-clockwise (left) [something a real telescope would never do], while maintaining that 45-degree tilt!

If that’s difficult to envision, imagine a large dowel, rod, or pole that runs through the mid-back and through each latissimus dorsi muscle, about 3 inches below each armpit and extends out from the body about a foot on either side. The focus here is to first point the “lat dowel” at the ball and then “hit” the ball with the other end of the “lat dowel.” On the backswing, point the left side of the dowel down towards or even behind the ball for a big windup. Midway through the downswing, the dowel will be roughly parallel with the ground on both sides. Just after impact, the right side of the dowel will point down towards the ball, indicating that you have used lateral bend. At the finish, the right side of the dowel will point forward and to the right of the target, depending on your flexibility. At all times the imaginary “lat dowel” has rotated around on a tilted plane, which is ironically the visual analogy that is often used for the shoulder line. But remember that each shoulder has a generous range of independent movement in multiple directions, which makes it easy to fake a good torso turn by moving the shoulder joints. Moving the “lat dowel” eliminates the cheating. The "lat dowel” analogy is a very effective swing thought for the short game: chipping, pitching, greenside bunkers, and putting too.

A swath of golfing problems will disappear when you learn to maintain your posture or spine angle and simply turn the upper torso back and through (i.e., use the torso muscles to turn). Many of the aspects of the swing that are taught independently are suddenly addressed, automatically. I've found more power and consistency with increased lag, because the wrists are less likely to flip. I've found that my hips don't move as much in relation to my upper body. Posture or spine angle maintenance is reinforced, such that the shoulders rotate perpendicular to the forward flexion angle. The tension in the left lat muscle--the sign of a good backswing coil--suddenly shows up. Because the arms, wrists, and hands are passive, the angle of the club face stays in the correct position in the takeaway, mimicking the spine angle. I've found the same torso motion is used, more or less, in every golfing stroke, including chipping and putting.

As the shoulders turn in response to the torso turn, forget the "left shoulder to right foot" tenet; focus instead on the right shoulder and ensure that it gets as near as possible to the RIGHT foot (i.e., the sternum should be over the inside of the right foot), which automatically creates the necessary tilt behind the ball and prohibits reverse pivoting while preserving a proper coil. This thought is especially important for the driver, but a more centered pivot might be the ticket for irons, pitch shots, and chips.

The gotchas (at least for me): Ensure the arms are lifting at the same rate your mid-torso is turning to keep your arms in front of you. You should be able to--during rehearsals--look at the club head during the takeaway and notice that it's still well outside the hands and the club face angle matching the spinal posture. If you just let the arms go and focus only on turning the mid-torso, you may suck the club inside early and then lift the arms late; the left arm ends up too far behind you and pinned too much across the chest, when the hands and club should stay in front of the chest. This error can cause some plane shift problems (e.g., laid off) and waywards shots. Also, a subtle bump into the left leg (weight shift) should be sandwiched between the torso turn back and through to help ensure an inside-out swing. Be aware of the tendency for the arms to collapse at the top; the arms should stop moving when the torso turn is complete; the arms should be relatively straight and tension-free; and the hands should be well away from your head, signifying a wide swing arc with no possibility of a collapse.

The turn away and back to and through the ball is accomplished by turning your torso. It is so often referred to by teachers and players as a shoulder turn, that many people believe that is the part of the body that should turn. This is confusing for new players and causes both new and experienced players to make the wrong move.

When you consciously think of making a shoulder turn, instead of rotating your torso, your move will be to force your left shoulder back. When you do that, your left shoulder comes up or flattens in golf terminology.

Quit Calling it the Shoulder Turn!

Mistakes occur when the hands or wrists initiate the first movement. Start to bring the club back using your torso and shoulders, not your wrists and forearms.

3 Keys for a Smooth Takeaway

The arms can be the culprits [of posture loss] if they initiate the swing by pulling the turn of the torso. The torso starts the backswing by rotating to the right, maintaining the address spine angle and the arms following.

Pinewild Country Club of Pinehurst

The first move away from the ball is absolutely essential. The hands, arms, stomach and chest must all turn together, as a unit. If you can't manage that, well, good luck, you've got very little chance to hit a good shot. But if you do manage it, you then have only to hinge the wrists and turn the shoulders to complete a perfect backswing. It's as simple as that. I've eliminated the complexity. I sincerely believe that anyone who masters these three easy backswing steps will have a rock-solid golf swing for life.

The Backswing - Nick Faldo

To turn more, you need to turn your torso during the backswing. As you swing back, try to turn your bellybutton 45 degrees to the right.

Backswing Shoulder Turn: How to Turn More

What is the pivot? The pivot is a blend of weight shift and a circular turning of the body. Or said another way, the pivot is both a lateral and a rotational movement of the hips, and the rotational movement of the torso and shoulders.

The Pivot and a Flat Left Wrist

One of the most confusing terms in golf instruction is "shoulder turn". Instructors that talk about shoulder turn to describe the amount of body turn during the backswing are hurting their students. What this means is if you start your backswing by pulling the club away with your hands, you may be hurting your swing right at the start of the backswing.

Instead of pulling the club away with your hands, push the club away with the turning of your chest. It will maintain the arms/body geometry and increase your chances of an on-center strike.

A Golf Backswing Mistake to Avoid

Early arm lift to line the left arm up with the turn and keep the hands in front of the chest…GOOD!!!!!!

[L] ate arm lift because the left arm is across the chest and the hands and club are way behind the turn…BAD!!!!

The left arm must lift

Getting the right shoulder over the right foot (lefts for lefties) helps you keep tilt behind the ball, gets you into position to have a shallow AoA [angle of attack] and no room for your arms to over run your turn.

Guess what…lag city.

Monte Scheinblum's Blog

So, summing up, for the production of power, a golfer should have a neutral (comfortably straight) spine at address. During the backswing, the thorax should rotate a lot relative to the hips; and the shoulders should rotate perpendicular to the spine angle which was set up at address. During the downswing, the spine should remain in its forward flexion, at least until impact, and the left hip should rise at that stage.

Anatomy of the Golf Swing – The Trunk/Torso

"While the arms do swing up and down and the wrists hinge and set, these motions are secondary to torso rotation," Parees said. "That is what creates the majority of speed in the swing."

PGA Golf Instructors | Golf Tips To Improve Your Golf Game

From a physics standpoint, a longer coil has more power, so in the back swing you might try to turn back from the mid-section to lengthen your torso coil rather than thinking of turning with only the shoulders.

Hip Sway in Golf - How to Add Club Head Speed

The term "shoulder turn" is misleading. You can easily make what looks like a full turn by pushing your left shoulder under your chin and lifting your right shoulder behind your head. That’s a full shoulder turn, isn’t it? Maybe, but it’s far from what you need to make a great golf swing.

What you really need to do is to make a full chest turn, turning your whole upper torso a full 90 degrees so that your back faces the target, and your sternum faces directly away from the target. When done correctly, this will create a high degree of separation (the "X-factor") between your hips and your shoulders, stretching the large, powerful muscles of your core, generating lag and putting you in the correct position to execute a fantastic transition and downswing sequence.

Drill 302. Backswing: Making a Full Shoulder Turn

Core Rotation: A big part of Sam’s [Snead] power comes from the core rotation of his body and flows through his arms and hands, down the shaft and into the clubhead. Shoulder turn? Yes, it’s important. However, without core rotation you’ve only got about 50 – 60 percent of your normal power. Imagine throwing a baseball without turning your core. Not much power there. Look at how far Sam turns his core especially in his hips.

5 Swing Keys to Consider in Sam Snead’s Swing – and Yours!

One of the more frequent mistakes I see golfers make is to stand up or lose their body angles through impact – the "stand and deliver" move! The loss of body angles or posture causes the body to stop rotating and as a result the hands now assume the responsibility of squaring the clubface. Remember – if the body does not rotate to clubface square, then the hands will help out. This move is very difficult to time, especially under pressure, and often leads to the hands overworking or flipping through impact. If the hands rotate the clubface too early the shot misses left and if they’re a touch late, then the shot misses right.

Hands Flipping

As you stand to the ball with the wrists slightly up, there is a straight line practically from the club head up the shaft and along your arm to the left shoulder, and as your hands are already waist high it needs only the inclining of the shoulders as we turn (on the pivot) to bring them shoulder high, without having altered their relative positions at all.

They [the arms] have not been lifted. They have gone up in response to the shoulder movement. This accounts for the curtailment and the control of the modern swing.

The Controlled Golf Swing

Finishing the backswing with a turn of the body, instead of a lifting of the arms, makes it easier to match up the timing and peak speed sequence of the arm swing and body rotation throughout the downswing to impact.

Golf Swing Synchronization

If the elbows bend, we shorten our radius and are not consistent with the position and length of our arms/club. Makes it much more difficult to return back to impact in the same position that we started (the goal). Also, elbow bending lends to "arm lifting". Having the arms take over and lift on their own, is the worst move for the golf swing. No power or repeatability. Lifting is a very weak move and the shoulders will stop rotating.

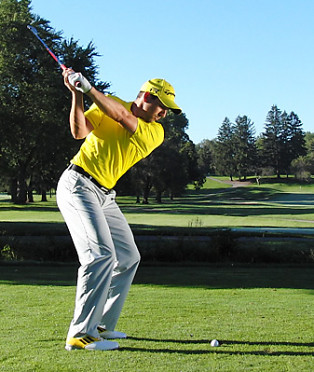
Move Less … Get Good!

Friday, September 20, 2013

Shortened Backswing

Short backswing
Garcia's short backswing.

One of my major problems is that my backswing gets too long; I learned this by studying video from a recent golf lesson. I can get the club to parallel, but the club ends up too close to my shoulders because my arms tend to collapse, decreasing width. This error causes many problems, including a tendency to cast from the top (as the left arm re-straightens) causing a loss of lag; this ironically slows down clubhead speed, even though the point of such a long swing to begin with was to increase speed and thus distance.

The cure? Shorten the backswing. Think short-slow back and then fast down. Maintaining connection is the best way to accomplish a short backswing; keep the upper arms pinned against the sides of the chest throughout the swing. A drill for this when the arms are at fault is to place a small rubber ball between the elbows and practice the backswing without losing the ball; another drill involves using a towel under both arm pits (or similar drills); those drills, however, don't address other ways the backswing can get long, such as too much hip turn, too much wrist hinge, grip coming apart, etc. Usually, it's an arm problem: The arms become disconnected and unsynchronized with the movement of the body.

Essentially, the arms should stop moving upward when the shoulders reach a fully turned position; there's no benefit to continue lifting the arms and club in order to get the club artificially to parallel. The right arm should not be consciously bent at the top; one should think of keeping it straight and pushing the left hand away from one's shoulder. The feeling is of using a 3/4 backswing and full downswing. In reality, the club will continue traveling backwards much further, even though the downswing has started, preserving lag. There's also a sensation that the elbows are staying oriented to the hips, keeping their downward orientation, even though the upper torso is turning away from the hips slightly on the backswing.

When pro golfers reach parallel (or even past it), photos show their hands are pushed well away from their bodies, and their left arm remains straight. Many amateurs--lacking the flexibility or ability of the pros--attempt to manufacture a parallel position by bending the arms or wrists too much, and as a result overswing and get the club off-plane. Instead of generating speed, this goofy looking position actually hinders speed. We long-swinging amateurs would do much better with a shorter backswing; speed and distance would actually increase for most of us, as would consistency.

What if too much hip turn is your problem or part of your problem? Too much hip turn has definitely been one of my problems; it may be yours too if you find your right leg straightening significantly on the backswing or if you notice you pull the ball (an excessively rotated hip turn in the backswing will lead to overly active hips coming down). Clay Ballard of RST has a great thought for limiting hip turn. Imagine your right knee has a laser pointing from it to the target line; try to leave that laser pointing at the target line as you go to the top of your backswing to feel a proper coil with minimal lower body movement. There are other similar ways, but this way definitely will get you coiling better. Another way to diagnose excessive hip movement on the backswing is to see yourself in DTL video; you will notice a gap appearing between your knees if there's too much movement.

All right, if you are still reading, you may want to brace yourself because your game is about to change forever. I know I shouldn't be doing this for free because it's probably the best tip you are ever going to get, but here it is anyway...SHORTEN YOUR BACKSWING!!!!! Probably not the first time you've heard this suggestion, but it is time to heed this advice.

A technician at a local electronics store once told me a truth about electronics that is very relevant to golf, "The more things that move, the more things that can break." Well, the same thing is true for your back swing. When you take a big back swing, your left arm breaks down at your elbow and at your wrists. Strange as it sounds, you also tend to under-rotate your shoulders. Both of these things not only cause you to be wildly inconsistent, but also actually cost you distance. That's right folks, too long of a back swing makes you hit it shorter, not longer. If you maintain a straight left arm, you will rotate your shoulders farther instead of bending your elbow and wrists.

When I tell people to take the club back to about 75% of their normal back swing, they almost all still take the club back past parallel! Parallel is the absolute maximum distance that your back swing should ever go. It is the MAXIMUM, not the GOAL of a normal back swing. You should only take the club back as far as your shoulders allow you to turn without bending your left arm at all.

Shorten Your Backswing For More Control

Most golfers have long swings because their arm swing continues to move after their shoulders have stopped turning. If this sounds like you, try to stop your arm swing once your shoulders have stopped turning. Doing this, you will be able to start your downswing with your lower body instead of starting your downswing with a "casting" motion of your arms and hands.

Local golf: Shorten your swing for better consistency

Slow down and limit the length of your backswing for more consistency.

You don't hit the ball with your backswing, you hit the ball on the downswing. A backswing that is too quick, or too long, can easily get the club out of position, and can prevent you from storing the energy needed for a powerful, consistent downswing.
Golf Swing Video: Shorten Your Backswing For More Consistency
Human nature says that the longer your backswing, the farther you'll hit the ball. But if this was true, why is it that I can hit a ball 300 yards with a three-quarters swing but I can't hit it 400 yards with a longer swing?
How a Longer Backswing Can Lead to Shorter Shots in Golf
It's really this simple: given that clubhead speed equals distance - with all else being equal - if my swing is long yet slow and yours is small but fast, you will get more distance than I will.

While a big backswing tends to promote deceleration, a short backswing does just the opposite.

A short backswing promotes acceleration. Your proverbial win-win. Mentally, it is almost like you don't believe the short backswing will do the trick, so you accelerate to make up for it.

Shorten Your Swing For More Power
Most golfers will gain distance almost immediately by shortening their backswing. A more compact swing not only give you more distance but it also give you more control over your swing and therefor better accuracy as well. The extra effort required to get the club past parallel , which is working against gravity, increases the chance of getting the club in a bad position.
Shorter Backswing
The solution is very simple: shorten up your backswing. Intuitively, golfers feel that this new position will cause them to lose power. But as a recent commenter posted"What I thought would result in a shortening of my shots actually gives me more distance."
The #1 Golf Swing Fault Golfers Over 50 Make
Now that you understand that you don't have to have a long backswing to generate power, how far should you go back? I tell my students that once their shoulder rotation stops, so should the club. You want the shoulder rotation to determine your backswing length instead of your club still going back long after the shoulders have stopped. At first, this shorter backswing will feel like you don't have a lot of power so it will be more difficult to do, but as you get used to it, you will soon see your shots fly just as far, if not farther, with half the backswing.
The Pro's make the golf swing look so easy!

Focus on your left arm. When you are making your backswing, feel like your left arm is going to stop parallel to the ground. In reality it will be further than that, but this is a good starting point.

Along with your left arm is your hands. Think of your hands only going slightly higher than your hip height. Again in reality it will be further.

How to Shorten Your Golf Swing
Jim McLean, currently one of the best teachers on the planet, has a great tip for the over swingers. As his teaching assistant, I saw first hand how effective this simple tip can be. Here it is: When the shoulders stop turning the arms stop swinging. This concept matches the body with the arms on the backswing. It also shortens your backswing for consistency. Most high handicappers allow their arms to continue even after their shoulders stop turning. This leads to a disconnect between the body and arms, and an extra long backswing. All potential for serious inconsistency.
A Shorter and Connected Backswing for Consistency
First and foremost, you are going to get more control by shortening your backswing. The second reason why a short backswing in golf is better has to do with an increase in overall distance. It seems counter-intuitive that a shorter backswing will produce longer golf shots, but that is precisely what happens with the average player. Shortening your backswing will enable you to avoid many back problems that are common to golfers.
Is a short backswing in golf better?
"I recommend that at some point, every golfer practice hitting balls with a three-quarter backswing," said Joe Hallett, the director of the PGA Center for Golf Learning and Performance in Port St. Lucie, Fla. "Then, when everything seems to be going wrong, you can fall back on the three-quarter backswing shot. It's a nice safety net, and it will solve a lot of problems.
Shorten the Backswing to Calm Things Down

Imagine your backswing as short, wide and tight. As you swing back, make sure your hands are outside your right shoulder halfway back (when your hands are waist high on the backswing). Also, in this position the wrists should be fully cocked.

Easy, Tiger! Shorten your backswing for more accuracy

I have sat on the range watching people hit on a launch monitor and seen this 1000 times if I have seen it once.

A long sloppy arm controlled backswing that produces 80 mph of club speed and 110 mph of ball speed.

Followed by a short compact shoulder controlled back swing, that allows the hips to clear and produces 95 mph of club speed and 140 mph of balls speed.

Then the proverbial, “That shorter back swing feels so powerless, I don’t think I can do that.”

It doesn’t matter whether it’s launch monitor numbers, or just eyeballing a drive that goes 10-20 yards farther, it’s all the same.

Almost every golfer has a backswing that is too long

To get an idea of what I mean by keeping your elbows in front of you, grab a club and take your setup. At this point your elbows are basically right in front of your stomach. From here they will go UP a bit so that they are out in front of your chest, but it's preferable that they don't go anywhere else relative to your upper body.

The Gateway To Better Golf: Elbows in front

Any attempt by the golfer to independently move the arms “around” the chest or “behind you”during the backswing will disrupt this proper V shaped up and down in front of the chest motion, and cause the golfer to “get stuck” with the arms too far behind the chest, i.e. too far to the right side. You will then “come over the Top” during Transition, trying desperately to get “unstuck”, and then of course the severe out to in clubhead path and early wrist cock release occurs, the signature start of the downswing move of the high handicap golfer.

Gotham Golf Blog: Mastering the Craft of Ballstriking By Jim Waldron

The best way to understand where your arms should connect to your body is to stand up straight in your natural posture, letting your arms hang down; if your posture is ok, you will find that you arms hang on the side of your chest. Try and feel where the connection point is because this is the same point when you take your golf address. Connection between arms and body at address should happen more on the side of the chest rather than on top of the chest, with the shoulders remaining back in the natural body’s posture.

Connection

There is a trend on the professional tours these days to shorten the backswing with all clubs. Surprisingly, there has been little or no loss of power in doing that. To shorten the backswing, have your arms stop going back when your left shoulder stops turning (for right-handers).

It is risky to keep the arms moving up and back after that shoulder has reached its flexible limit. And don’t consciously cock your wrists. They take care of that by themselves.

Golf Tip of the Week: Shortened backswing helps with accurate distances


Wednesday, November 14, 2012

Shawn Clement's Braced Tilt

I'm a huge fan of Shawn's teachings; plus, he's very generous in that he gives away tons of free instruction via YouTube. Due to his generosity, I send him a PayPal tip each month. You can find his web site here; he also offers very reasonable online video analysis and a DVD instructional series.

Shawn has a lot of great ideas and methods that are highly effective. His drills should be mandatory for every golfer, regardless of whether you agree with his instruction or even try his swing method. The drills include his classic perpetual motion drill, feet-together drill, and one-leg drill. You can use these to ingrain the fundamentals of the Clement swing, which in my opinion is focused on helping the novice golfer learn to stay centered, the opposite of which (swaying) may very well be the biggest error a beginning golfer makes. I've written about the pivot in several other posts, but Shawn's method may be the one to develop a consistent pivot and swing, resulting in fantastic compression and contact with relative ease. In a sense, most of the effort is spent in the setup fundamentals and the rest left to physics.

Shawn teaches "bracing against a firm left side" with the body tilting away from the target starting at address and all the way through the swing. This involves presetting some secondary axis tilt, such that more weight is on the left leg at address, the head is behind the ball (until well after impact), and the weight in the right leg is concentrated on the right instep (he describes the address weight distribution as 60% left - 40% right). The backswing pivot is more a turning of the posterior than anything else, and the slight backwards weight shift is concentrated on the inside of the right leg and inside of the right foot; there should be a feeling of pressure ONLY on the inside of the right leg and right instep, and the right knee and right hip should feel "locked" in place briefly at the top, before the transition of weight back to the left leg. Another description is that it feels like sitting back on the right leg, so you should really feel it in the right hip.

Before you start thinking this is Stack-&-Tilt, it isn't, because Shawn teaches a backward and forward weight shift during the backswing and downswing, respectively. It's just that the weight shift he describes is very minute; he states that it is "about an inch long." I would describe it as: address, 60-40; backswing, 50-50 (or maybe 45-55) onto the inside of the right leg due to the weight of the arms and club; downswing, 60-40; and finish, 95-5 (again due to the weight of the arms and club). By contrast, S&T has the golfer starting 55-45 and leaning left at address, with no weight shift on the backswing (the upper body continues leaning left throughout); the weight favors the left side at address and progresses more and more left until the finish.

Shawn's swinging motion is passive and he describes it as "assisting momentum towards a target." In other words, one tosses the "arm-club unit" to the right on the backswing (the club feels somewhat weightless at the top) and then one allows it to fall on the downswing, with one's posterior providing a counterweight to the swing. In a sense, the golfer is setting up as a crane or catapult, and the butt acts as the means to propel the club. Shawn even says that the downswing weight shift "happens behind you," such that the butt moves left ("about an inch long") to shift the weight back into the left leg before the club comes through. The right butt cheek moves backwards on the backswing, and then the left butt check turns back to join it in a line on the downswing.

The result of this swing method is a tighter, circular motion that doesn't waste as much energy, and a stable low point. This results in increased consistency, compression, power, and divots in front of the ball.

Characteristics of Shawn's swing method include hips that turn nearly as much as the shoulders (don't go looking for McClean's X-Factor here), head staying behind the ball, arms and hands staying in front of the body, left foot prevented from spinning out, right foot staying planted longer, left knee ticking in towards the right leg on the backswing (even at address), allowable head movement, left heel unconsciously coming up on the backswing, passive arms (i.e., tossing the arms to the top and letting them fall), wrists that hinge naturally up-and-down due to the club's weight (i.e., float loading), and a takeaway that begins with a slight leftward move, as if one is already in motion at address (hence the perpetual motion drill). Shawn feels that a slight move that mimicks a throughswing as a starting motion (catching the next backswing) is best for keeping the swing relaxed and effortless.

My personal experience with this method is that it really adds distance and makes the golf swing "easy." However, I start coming off the rails with this swing by producing fat and thin shots, and the reason is two-fold: 1) there MUST be a move into the right leg on the backswing (even if it is very slight), and the correct feeling is one of pressure on the inside of the right leg with the right knee and right hip locked in place (i.e., I can occasionlly get too frozen over that left leg in the backswing); 2) the head--it must start behind the ball at address and remain there until post-impact (this one goes along with the first error--keeping the weight too left on the backswing can have the tendency to cause the head to be too far left).

Passive arms: It's important to simply get to the top and leave the hands and arms there, especially with the driver. Toss the arms to the top and then let them fall and/or move in response to the lower body's movement. Don't do anything else--pull or push. Allow the arms to simply drop and whip through in response to the lower body motion. Any attempt to consciously or unconsciously steer, pull, push, or guide the club will contribute to errors. Picking up on this in oneself is difficult because the difference between steering and just letting it happen is very subtle.

I have so many videos that explain what you are asking here; they all start with "Braced Tilt", "Braced Tilt Part 2", "Tilted Spiral" part 1, 2 and 3 and my latest, "Feel the Braced Tilt" which will explain so much for you; it all comes down to 60% on the lead leg; Use the trail leg as a support post to keep you against the led leg which is your leaning post.

One Leg Drill Amazing Power Compression; #1 Most Popular Golf Teacher on You Tube Shawn Clement - YouTube


Saturday, September 8, 2012

Belt Buckle Basics

I've written about the belt buckle in previous posts on golf's triangles and always keeping the club in front, so I thought I'd write a little bit to unify the ideas, especially since this can be a key swing thought. This may be the most crucial golf swing thought for the full swing. Simple swing thoughts are best, and using the belt buckle is one way to unify a lot of swing thoughts and fundamentals and keep the approach to golf as simple as possible.

Your belt and belt buckle--especially when related to the butt end of the club handle--can show you a lot of things.

First, the belt buckle shows you whether you've made a good setup posture and address position. As Brian Manzella has stated, the belt buckle should point down toward the ball at address (at an angle) and the butt end of the club should point toward the belt buckle. It's almost as if your club is an extension of your belt buckle; in a sense, your belt is a loop around which the swing is powered. This will ensure that you have the correct pelvic tilt (i.e., protruding rear end) and that the club (and thus hands and arms) is in the correct orientation.

Second, the belt buckle shows you how to do a good takeaway or pivot back. In the beginning of your swing, the belt buckle and butt end of the club should maintain a close relationship. That is, the butt end of the club will continue pointing at the belt buckle, or remain close to the belt buckle, during the takeaway. Only once your club reaches waist height should the wrists begin hinging the club upward; the butt end of the club will begin to point down the target line but will still be in close proximity to the belt buckle, before the right arm folds into the full backswing. Think of the club shaft as an extension of the belt buckle in the takeaway.

Third, the belt buckle leads the downswing. As the downswing begins, the club's butt end and belt buckle become the most disassociated, with the club handle trailing the belt buckle. During the swing, the butt end of the club and the belt buckle quickly and dynamically become reassociated at impact, when the left arm and club reach an inline condition. In other words, the club handle quickly catches up with the belt buckle through impact. The club and hands finally pass the belt buckle on the followthrough and fully disassociate again at the top of the finish. Simply moving the belt buckle over your left leg WHILE AT THE SAME TIME turning the belt buckle to the target (while the shoulders remain closed and arms remain unengaged) may be the best swing thought for the downswing, as this reflects starting the downswing from the ground up (i.e., leading with the hips). Think of the club shaft as an extension of your belt buckle and imagine you're hitting the ball with your belt buckle (as if a club was extending from it). This thought will help you time the arms with the body and not get stuck (arms trailing too far behind); in other words, this thought is great for properly synchronizing the arms with the body rotation. Remember, the club shaft and belt buckle disassociate and reassociate based on vertical movement of the arms from the shoulder joints, not horizontal movement; the club, hands, and arms should always stay in front of the torso!

Finally, the belt buckle shows you where your ball is heading. Turn the body through so that the belt buckle points towards your starting line. If your belt buckle points right at the end of your swing, your ball is likely starting there (with the right spin, it may not end up there). Same thing if pointing left.

Another way to consider this concept is to visualize a 4-inch elastic cord connecting the end of your club to your belt buckle (there have been similar training aids available on the market). At address and during the takeaway, the 4-inch distance is maintained, but the cord begins to stretch in the backswing, creating stored energy. As the belt buckle dynamically turns towards the target and the left leg straightens, the energy is released and the elastic cord quickly returns to its original 4-inch length at impact (when the left arm and club reach an inline condition). Finally, the cord again stretches on the followthrough and to the top of the finish.

The belt and the belt buckle is a terrific alignment tool you can legally use on the course for a number of good things in the address position, posture, and swing. The butt end of the club handle (and thus the hands) are closely associated with the belt buckle in the takeaway, slowly disassociated from it to the top of the backswing, and then QUICKLY reassociated with it through the downswing and into impact. Then they dissassociate again on the other side. But remember, the hands and club handle should be close to the belt buckle again at impact (almost as if extending out of it, center-mast)!

In order for your belt buckle to point at the target on your finish, you must rotate your hips powerfully through the ball on the downswing. Powerful hip rotation alone, however, is not enough. You must also have a proper release and good lag on your downswing. But one of the easiest things to think about and visualize is where your belt buckle ends up as you complete your swing. Therein lies the power of the tip.

Golf Swing Tip: Finish With Your Belt Buckle Facing the Target Like Rory McIlroy

For each, square the face, angle the shaft, then stand to the handle so the grip points at your belt. That establishes the correct ball position.

Golf Digest's Best Young Teachers: Travis Fulton: Golf Digest

Top 100 Teacher Shawn Humphries says to keep your club pointed at your belt to stay on plane and hit better shots.

Hump Day Tip: Perfect Takeaway - Video | GOLF.com

At impact the golfer’s belt buckle will have shifted well left of the golf ball and will have begun turning left. The hands will also preferably be past the ball on all shots but the driver.

Weight Shift in Golf Swing – Herman Williams Golf

Point the butt of the club at your belt buckle and your belt line toward the ball.

"Belt line at the ball - Brian Manzella"

THE CLUB STAYS IN FRONT OF ME

My coach, Chuck Cook, says I do a great job of keeping the club in front of my body throughout the swing. Amateurs tend to swing mostly with their arms, so the body lags behind; better players can get fast with the body turn, so the arms lag behind. If you focus on turning back and through with the club staying in front of your chest, you'll find it easier to square the clubface and hit straighter shots.

Golf Instruction: Jason Dufner: Duf's Moves To Hit It Solid: Golf Digest


Friday, August 31, 2012

Make a Centered Pivot

Stay on the ball! This is another one that is often debated among teaching professionals (no shortage of such debates really), and slow-motion videos of touring pros are often used to emphasize the point that the head can and occasionally does move rearward in varying degrees during the backswings of many great players. (And yes, you can find videos of pros that illustrate a centered turn as well...far more these days than days of yore.)

But we've also heard the adage that we should "turn like you're standing in a barrel." While I think you'll find that there are no shortage of differences among professional golfing turns and pivots as they relate to the position of the head during the backswing and downswing, I believe that we amateurs benefit by staying as centered as possible. Why?

If you move off the ball during the backswing (i.e., your head shifts too far over towards your back foot), you've effectively moved the swing center backward from where you established it at address. In short, you've introduced unnecessary inconsistency into the swing. This means that the bottom of your swing arc has also moved backwards and will require timing to get it back to the right place consistently. Remember, pros can do all sorts of crazy things because of their talent--not necessarily because it's the right way. Also, you increase the chance that you'll sway (i.e., your weight will move to the outside of your back foot instead of staying on the inside where it should be).

Here's what you should try. Set up using the proper posture, grip, aim, and body alignment. With your shoulders properly squared to your knees and hips, your right shoulder should be noticeably lower than the left (assuming you play golf right-handed), and this will place your head slightly behind the ball using irons and wedges (the wider your stance and longer the club, the further your head will be behind the ball at setup).

Now, focus on the keeping the lower body stable and unmoving during the takeaway and backswing, as your shoulders turn and your weight turns into the inside of your back leg. The feeling you want is that the hips and knees stay parallel to your target line for as long as possible and only move in response to the shoulders turning back. Your head may move slightly to the right as a result, but it should stay relatively steady.

Achieving a centered pivot is possible when you recognize that the right hip does NOT move to the right at all during the takeaway: It moves straight back and even towards the body's center line in response to a proper shoulder turn, and the right leg stays angled towards the target (does not move towards a perpendicular-to-ground position). The right knee also stays bent. As a proper on-plane takeaway keeps the club head outside of the hands, the correct opposing move is for the right hip to move straight back. This thought should also keep you pivoting correctly.

Now simply unwind into your downswing and try to keep your head in the same place (or even moving slightly back) as your arms come through. One thing all pros do is to keep theirs heads behind the ball during the downswing. In some cases (especially with the longer clubs like driver), you will notice that the heads of professional players will sometimes even move further back (secondary spine tilt increases) as the arms come through. But that's only during the downswing and usually with longer clubs.

Slightly kicking in the right knee at address or at the beginning of the backswing will assist in stabilizing the body and help prevent a lateral sway off the ball.

Strive to stay centered on your backswing pivot and behind the ball on the downswing and you'll gain consistency.

The classic teacher from the 1930s Percy Boomer coined the phrase "Turn in a barrel." Boomer recognized that turning around your body, rather than sliding your hips sideways, results in more consistency. It's difficult to hit it solid when you move off the ball on the backswing, because you have to move back to the ball the exact same amount to hit it flush. That takes more talent than most golfers have and more practice than they can afford.

Jim Flick And Jack Nicklaus: Turn Don't Slide: Golf Digest

"Turning while keeping your chest in place not only eliminates swaying and the likelihood of fat contact, it improves the quality of your rotation, because if you sway you can't turn. Ditch the sway and your backswing becomes 100 percent rotation."

Hunter Mahan, Keep Your Chest Over the Ball, Hunter Mahan's Five Moves to Make Your Swing Great Photos | GOLF.com

The body needs to make a centered turn around your spine with limited up and down or side to side motion, thus creating an efficient coiling of the upper body and lower body.

Increase Swing Speed for More Distance | Instruction Feature | PGA.com


Saturday, April 28, 2012

Adjustable Drivers

Adjustable drivers are all the rage these days; golfers can adjust various attributes of the club to suit their swings and help correct ball flight errors. My Nike SQ Machspeed driver is a square-headed, thud-making monster; I keep it adjusted to a flatter lie with a slightly closed club face position (because my ball flight error tends to be a slice).

However, I've noticed that on days when I'm making a good turn behind the ball and using a reasonably strong grip (slightly more than neutral), I can start pulling, hooking, and hitting really low shots off the tee with it. This is why it's important to be able to diagnose what's going on while playing. Two primary components of ball flight are swing path and club face; the two are joined at the hip and synergistic.

When I know I'm making a good turn behind the ball (full shoulder turn) and getting an inside-out swing path and the ball is hooking, pulling, or going low, I know that my club face is too closed to match that swing path. Suddenly, my adjusted driver becomes an enemy. True, I'm not slicing…I'm just doing the opposite, which can be disastrous too.

In those situations, a slight grip change may be all that's needed to correct the ball flight. I've noticed that the stronger grip I use for my other lower lofted clubs (like the 3-hybrid or 5-iron) can produce low and/or left ball flights with my adjustable driver, if I'm swinging on a good inside-out path. So (and every day on the golf course is different), I will slightly rotate my grip to the left (V's pointing between my neck and right shoulder as opposed to directly at my right shoulder) as a fix. Usually, this small change will straighten my ball flight and produce a higher draw shape.

However, go too far with the grip (or start making an incomplete turn) and the ball will start fading or slicing again. Golf is great, huh?

Friday, April 20, 2012

Throw Sand at the Flag

I usually don't have much trouble with two particular shots: fairway bunkers and punch shots out from under trees. And these two shots are very similar: grip down on the club (except in the sand one should dig in the feet as much one grips down), ball back of center, steady lower body, armsy swing. The goal is ball-first contact.

But greenside bunkers have been a problem for me; I've been very inconsistent. A greenside bunker shot is an intentional fat shot--albeit a slightly fat shot. My primary error is to take too much sand with the heel digging, and I fail to get the ball out in one shot. In other words, I hit the ball TOO FAT.

But there's a fairly failsafe method for escaping greenside bunkers. On the backswing, break the cardinal rule and REALLY cup the left wrist!!! This is going to feel so goofy and wrong (because on regular shots from the tee or fairway, it would be), but used with a full swinging motion that doesn't decelerate after contacting the sand, the ball will come out high and onto the green every time! The reason is that this ensures the club face remains open through impact and that the bottom of the club (the bounce) will be used to move sand. You can hit lower shots simply by digging the feet in more to take more sand.

There's also a good tip from Shawn Clement helps me ignore the ball more and get it out more easily. Do all of the traditional setup and swing fundamentals for a greenside bunker (or a pitch shot) but then think of this one thing: Think of hitting the sand a few inches behind the ball to the target. And being exact in WHERE you enter the sand isn't so critical, so long as you hit sand first. So the goal isn't the ball; it's the sand behind the ball that must be put in the hole. This changes the focus, because that image will help splash sand toward the target and take the ball along as an added benefit.

And how to do this (sounds easy, eh)? Setup is so important for bunker shots and high pitch shots. Really exaggerate the forward ball position, open the club face, and assume a weak left hand grip.

Elements of a good greenside bunker setup: I want the club face opened (more open for a higher shot) and club positioned in the middle of my stance; but I want the ball positioned off of my left big toe (in other words, exaggerated really forward). The more forward the ball position, the less sand you'll take and the shot will be longer and higher (go to far and you'll catch it clean and take no sand). The more back the ball position, the more sand you'll take and the shorter and lower the ball will travel. I ensure my left hand grip is very weak so that I won't close the club face coming through. I also really cup or dorsiflex my left wrist on the backswing. Then, I just make a full swing with a complete turn back and then turn through. Making a full turn and normal swing IS important. Also, stay loose through this shot and feel the club head; tension will kill the shot. Done correctly, even a slow tempo will blast the sand and the ball out of the bunker towards the target.

Another way to think of the greenside bunker shot is to setup and swing as if you're hitting a driver. This means the ball is off the front foot and the swing going back and through is shallow (more around the body rather than up-and-down)--the way it needs to be to keep from taking too much sand.

A lot of these same principles will work for pitch shots as well. You can even play the ball off your big toe for pitch and flop shots and not fear hitting fat. With the weak left hand grip and opened club face, you'll usually slide the club along the grass before launching a high piercing and spinning shot.

1) Get good footing: Grind your feet firmly into the sand. This will help promote a solid stance and good balance. It's also a way of doing some detective work, to determine the texture and consistency of the sand. Since the Rules prohibit you from grounding your club in a bunker, you should try to learn as much as possible about the lie as you take your stance. 2) Choke up about an inch on the club: When you grind your feet down into the bunker, you bring your hands closer to the ball, so you need to slide them down the grip. Otherwise, you'll tend to hit well behind the ball and dig too deeply into the sand. 3) Open your stance: Most bunker shots require a steep downward attack on the ball; an open alignment, with the feet, knees, hips, and shoulders pointed well left of the target, will facilitate this type of impact. You'll need to open up various degrees for the different shots, but it's safe to say that 90 percent of bunker shots are played from the open stance. 4) Don't keep your eye on the ball: Instead, watch a spot about an inch to an inch and a half behind the ball, because that's where your impact should be. Since you don't need to hit the ball on this shot, there's no reason to look at it. Again, the precise spot will vary, but suffice it to say that the spot is never on the top of the ball.
From Learn The Basics of Sand Play by Greg Norman
Most amateurs swing the club into the sand, and when they feel the resistance, they quit on the shot. Plus, they're fearful, so they tend to lock their bodies in place and just wave at the ball with their arms. Commit to turning to a full finish, and you'll get the ball out every time.
Hank Haney: How To Hit The Basic Sand Shot: Golf Digest


Using Shoulder Turn to Fade or Draw

I've posted already about setups to hit the fade and draw and the D-Plane (which explains the ball flight laws). My big fall flight error (like most amateur golfers) is the slice. Sometimes I set up to hit a draw and still end up hitting a slight fade (works out okay sometimes), or sometimes I'll set up to hit a fade and it will become a slice. That tells me that I'm compounding the left-to-right ball flight with my setup. And I've done the same thing with the draw too--setup to hit a draw and then end up hooking the ball off the course. Unfortunately, there are times when I've set up to hit one and hit the opposite (I'd rather not talk about those times right now).

Recently I was hitting fairly straight tee shots with a slight fade and was trying to figure out why I couldn't hit the tight draw that I was hitting a few days before. Everything SEEMED the same, but it obviously wasn't. Then I hit on it: I was NOT turning my shoulders back fully to 90 degrees. I noticed that my left shoulder pointed in front of the ball at the top of my backswing, which was giving me a slight outside-in swing path. That path along with a square club face should produce a fade; if the face was open, it would produce a slice (basically a severe fade from which it's hard to recover). Anything used on top of that to exacerbate the outside-in swing path would produce a more severe fade or slice, even with a relatively square club face.

Golf is really about trying to diagnose and repair what's screwed up during a round, because it's easy to get lazy and let bad habits or old tendencies creep in without realizing it (e.g., partial shoulder turn, right leg straightening to much, not keeping the arms in front, etc.). If you're getting a slice, it can be a lot of things, but I know I have a tendency to get lazy with the shoulder turn (which can cause a laid-off position at the top). I have a tendency to let the arms get too much across my chest (too inside leading to outside-in), and I have a tendency to get too handsy with my takeaway (too inside on the backswing that can lead to OTT).

The reason it's tough to diagnose why one might be fading, slicing, hooking, pulling, pushing, or drawing when it's not intended is that ball flights are a marriage between swing path and face at impact. If you KNOW your path is inside-out but you're push-slicing then you have an open club face. I believe this was more my issue when I first started golf--I simply was blocking the club face open and would often end up with a push-slice. Sometimes (unless you're really paying attention to yourself compared against the fundamentals), you may have trouble diagnosing what you're doing wrong.

Given that I noticed (this time) that I wasn't getting my back to the target at the top, I hit on the idea of using a variable shoulder turn to try to hit cuts, straight, and draws, especially since the traditional setup ideas to hit them usually give me severe slices and hooks instead of the intended flights. What if I simply used less shoulder turn for a fade and more for a draw? Then I could aim left of my intended target and hit the fade and vice versa for the draw. I wouldn't have to worry about all the other aspects of hitting fades and draws. If you think about it, it's the equivalent of opening or closing the stance to hit a fade or draw, but adjusting the stance requires the same full turn on both.

Here's something to try: To hit a fade, try turning the shoulders so that the left shoulder points in front of the ball at the top (from your perspective looking down); you shouldn't be able to see your left foot because your left shoulder will be shielding it from view. For a draw, turn more fully so that the left shoulder points behind the ball and covers the right foot from view. A straighter ball will be somewhere in between. Don't do anything else differently (except for where you aim)…use the same grip, square stance, takeaway, and ball position. The point here is to manipulate only one variable: swing path (and to do so as simply as possible).


Sunday, February 19, 2012

My Golf Lesson: Laid Off

I recently took some online video lessons with famed teaching professional Bobby Eldridge out in AZ. I highly recommend giving Bobby a shout; he's very good!

To my surprise, Bobby immediately picked up on something I hadn't considered: I was too laid off at the top. In other words, my club shaft pointed well left of the target line instead of more parallel to my target line. This move was causing my pulls, pull hooks, deep divots, and slices, because one unconsciously corrects for this by coming over the top (OTT). This is something that is hotly debated among golfers and professionals, as there have been many great golfers who appear 'laid off' at the top of their swings. Ben Hogan has even been accused of this sin. For clarity, the opposite of being laid off is being across the line, meaning the club shaft points right of the target at the top, and this move supposedly leads to hooks and coming too much from the inside.

It's also important to note that having the club point left of the target doesn't necessarily mean that one is "laid off" in the negative sense. What's important is being "on plane." When you're on plane it's not neccessary to get the club to parallel (reference Hank Haney's 7-Steps book). A better description of being "laid off" is a swing plane that is too flat, regardless of where the club points at the top.

Bobby didn't think so, but from my previous Hank Haney online lesson, I know that I have failed in the past to get a full 90 degree shoulder turn; this can contribute to a laid off backswing. It's easy to comprehend that an incomplete shoulder turn will cause the club to point left at the top.

Now, what I'm describing flies in the face of a reversed loop swing that I've championed before; let's face it, a reversed loop swing is a correction (i.e., defeating a steep backswing with a shallow downswing). It works well for some professional golfers with impeccable timing, and it helped me too (for a while). But because it's a correction and requires timing, it's not easy to do (for me anyway).

As I'm a mere mortal (beginning golfer), how much better would it be if I could keep the club on plane all the way through? This is what Bobby was getting at with my backswing. The correct feeling has more to do with the arms and club staying in front of the chest, back and through. For me, it feels very vertical, but it definitely agrees with Shawn Clement's commentary on the arms "falling down the plane." It seems easier to hold the lag and allow the arcing motion of the club shaft to happen late (more due to arm rotation than shoulder rotation), thereby producing an inside-out club head motion. When I swing down this way, I focus on the inside of the ball, as if that's where I'm trying to hit it (the only way to do that is by this arcing motion with retained lag). Extension back and through seems more natural as well, and a 90 degree shoulder turn is important to get the club pointing down the target line (without the arms collapsing). And as you can see from Clement's explanation, the right elbow-right hip relationship is important too, with the right elbow falling down IN FRONT of the hip--not attaching or crashing into the side of the hip. The hips must rotate to shallow out the vertical motion.

One should feel as if one is pointing the club shaft at the target at the top of the backswing; if the club points to the left of the target, it will be too laid off, which can cause nasty slices and pulls on the way down, depending on the corrections one makes in the downswing. Here are some tests to determine whether one is laid off at the top:

Take a full backswing but stop at the top of your swing. Simply loosen your grip and allow the club to fall on you. If the club is on plane correctly, it should fall on the tip of your right shoulder. If the club falls too much toward your neck or head, your plane is too steep. If the club falls below your shoulder, your swing path is too laid off or flat.

[From Golf Swing Plane Tips]

Wherever your eyes are looking, your hands and the clubhead will want to go. If your eyes are looking at the back of the ball at address, then you are probably trying to square the clubface to the back of the ball at impact. Address and impact are two very different alignments in golf. Focus your eyes on the inside quadrant of the ball at address and your hands will strive to reach your new focal point. By making this small change, you will be well on your way to improving your downswing and obtaining much more manageable misses.

[From Classic Swing Golf School]

Following the takeaway, focus on folding the right elbow up, not out behind you. Your swing should feel much more vertical than before. More importantly, it should feel shorter. That’s a good thing since, whether you believe it or not, a good backswing is only 18 inches long. From setup to the top, your right elbow should move just about a foot and a half, from the center of your torso to just outside the right hip.

[From Golf Tips - Elbow Room]

The key is we have to fight this by trying to keep the shaft as vertical as we can in the transition and down to impact. If we let the shaft fall back it will lay off as much as parallel to the ground or more and also fall more inside. This will cause getting trapped behind the body approaching the ball, causing a big inside out swing path that will hit big blocks. To stop the blocks, big time over rotation of the arms hits big pulls.

[From Laid off at the top of the Backswing…Cures, Tests and Drills - Surge's Daily Golf Swing Tips]

One classic problem is leaving the club pointing left at the top or as we call it laid off. This can be caused by an inability or unwillingness to complete the turn on the back swing. If you only turn your shoulders 45 degrees instead of the preferred 90 degrees, the club will likely be 45 degrees left of target, a major cause of the classic pull or slice swing. Even players who typically do it correctly on the range may find that the tension of the golf course prevents them from completing the back swing and causing an improper path.

[From Club Position]

Think of yourself as a righthanded batter, with a golf ball sitting on home plate. As you move into impact, try to sling the clubhead toward right centerfield. Approaching the ball from inside the target line like this—as opposed to down the target line when you try to hit the back of the ball—relates the shallow arc necessary to make centered contact and compress the ball so it shoots off your clubface like a rocket. At impact, your clubface should strike the lower-left quadrant (the one closest to you) of the ball.

[From How to Max Out your Irons | GOLF.com]

When you reach the top of your backswing, allow your hands to drop the club straight down. If the shaft hits your shoulder, then great—you’re on plane. If the shaft missed your body and the clubhead falls behind you, you’re probably laying off too much and you need to keep your hands and shaft above your shoulder in order to get back on track.

[From No Layoffs! | GolfTipsMag.com]


Monday, January 16, 2012

Full Shoulder Turn

A full shoulder turn (90 degrees)--with hips that turn only to 45 degrees--has been described as a top backswing fundamental. I believe that, when performed the correct way (see Pull vs. Push below), it may very well be THE top fundamental for the full swing and pitch shots.

I feel that making a complete shoulder turn is one of the most important fundamentals in the golf swing. I think between having a good grip, a smooth tempo and a full shoulder turn, you can really play solid golf--and that's without thinking about "swing positions" or anything else!

So what do I mean by a full shoulder turn? I mean that on a full shot, strive to turn your shoulders 90 degrees. Your lead shoulder (left shoulder for a right-handed golfer) should be under your chin, and your back should be facing the target.

[From The Importance of a Full Shoulder Turn]

Check to see if your back is turned to the target. When you make a full 90-degree shoulder turn, your target should be directly behind your back.

Correct Shoulder Turn

[From How to Tell If You Are Making a Full Shoulder Turn | Golf Tips | Golfsmith]

Most golfers know that a full, 90-degree shoulder turn is a crucial element of a solid golf swing. Without it, a proper weight shift and a correct swing plane are almost impossible to achieve. A good shoulder turn not only ensures that your shoulders and chest are behind the ball at the top of the backswing, but helps maintain consistent balance throughout your motion. Before you can master a proper shoulder turn, however, it’s important to understand what it entails and exactly what it is.

[From Golf Tips - Turnstyle]

How does one know what "correct" looks like? Examine any professional golfer at the top of the backswing in the front-on view. Note in the photo the lines drawn on Ernie Els' beautiful backswing. The line drawn on his right shin is angled back towards him and towards the target; also, note how the line separates from his waist, demonstarting that his right knee is well bent at the top, ensuring no hip over-rotation and no sway to the right. Then notice the line drawn on his left lat; it is angled in toward the right leg and away from the target! This is a good solid pivot behind the ball, with no sway and no reverse pivot. If you can draw these lines on your backswing at the top with the same relative angles, you have a solid pivot.

Push vs. Pull

The correct takeaway or early backswing feeling is to "pull" the right shoulder 90-degrees straight back until it's behind one's head, with the left shoulder just going along for the ride, until it's behind the ball; the incorrect feeling is to reach over with the left side, or "push," to get the left shoulder behind the ball. It's as if there's a wall just outside the right side of the golfer's torso (not legs), and there's nowhere for the right shoulder to go except straight back. This is the correct shoulder rotation; don't even think about the left shoulder...it will follow. A really cool result of this line of thinking is that the upper swing center (the middle of your chest) will NOT move off the ball, and when you shift your weight into the left leg to start down, the upper swing center will be just in front of the ball, ensuring you hit ball then ground.

Chuck Quinton's Rotary Swing offers this great idea for easily achieving a 90-degree shoulder turn (even older players); I tried this, and I was amazed at how different (and great) it felt. Basically, Chuck is saying that a "pull" shoulder turn keeps you more centered and simplifies the movement, while a "push" shoulder turn moves you off of the ball. Pulling the right shoulder straight back uses a different group of muscles than the pushing the left shoulder back. And according to Chuck, this efficient movement will even take care of the takeaway. And a little digging around on the interwebs validated this concept; there are many others who are teaching this pull the right shoulder back versus push the left shoulder back method.

Performed correctly, you will get a nice, centered, one-piece takeaway, where the right arm stays above the left for most of the backswing, when viewing face-on. The wrists and right elbow seem to fold up naturally, the hands don't get too close to the right shoulder, and the left arm doesn't collapse. There should be no thought given to moving the arms, wrists, or hands to get the club started back and to the top--just consciously move the right shoulder straight back and let everything else follow. This is where maintaining the triangle formed by the arms and club head for as long as possible comes into play: the right wrist shouldn't dorsiflex backwards here (which would yank the club inside), the right elbow should not bend yet (it stays straight and above the left arm for as long as possible), and the wrists shouldn't cock upwards yet (which would shorten the backswing width). The right shoulder is pulling the stable, intact triangle assembly back in one swoop--a one-piece takeaway.

Now for the "gotchas." Doing this is a distinctly different feeling than pushing the left shoulder over and back as you may have been taught. And if you're not careful, it can lead to some other problems (this is true for any positive change you might make to your golf swing).

First, it's important to keep the right elbow pointed down at the top; don't let it chicken wing, fly, and point out behind you, as this can cause the left arm to collapse and other errors. Pulling the right shoulder back immediately doesn't mean the right elbow should do the same thing. Just focus on turning the right shoulder back and keeping both arms straight for as long as possible. Then simply allow the right elbow to fold such that the right hand goes straight up, the right elbow point pit points straight up, and the right elbow stays pointing downward. Next, be aware of the potential for the right leg to straighten too much, causing a lean to the left at the top. This can show up as a feeling of too much weight on your front leg at the top and a pull or slice ball flight. To fight it, remember that more weight should be on the inside of the right foot at the top, and the left shoulder should point behind the ball; you should start your downswing by bumping the left hip slightly and then turning left using the left lat as "center" of the downswing. This should get the path going inside-out and a ball flight starting out to the right before slightly drawing back onto target.


To get the proper shoulder turn, has a very simple solution: Turn your right shoulder back (not your left) and behind you. So many golfers have been told to turn their left shoulder back that their left shoulder might be pointing behind the ball, but the right has stayed were it was. Bio-mechanically your shoulders can squeeze together which is what most amateurs do. I call this a false turn.

Make a Better Shoulder Turn - Marc Minier

The right shoulder contains arguably the most powerful set of muscles that could help start the swing and concentrating on them can override mistakes that the smaller fast twitch muscles might make. Concentrating on turning the right shoulder away from the ball helps stop excess hand action, which is one of the most common backswing faults.

Golf Swing Shoulder Turn Drill | Suite101

When you start the club back, the right shoulder does NOT move sideways (to the right)…at all! This is a lateral movement that will create all sorts of compensations coming down.

The right shoulder moves BACK immediately!

Golf is a rotational movement, so the rotation of your shoulders early on is critical to getting to the top of your backswing in the correct position, in order to have a full golf swing loaded with power. So from now on, I want you to think of your right shoulder going back when you take the club away, NOT to the side.

Golf Backswing: Right Shoulder Motion Is A Must

Does it really matter if we pull or push? Yes, it does. People say that we should use the “big” muscles in a golf swing. These big muscles work by pulling, so pulling is bio-mechanically correct. They never tell us where these big muscles are, but they are primarily in your back.

Guest Column #2 (The Biomechanics of the Golf Swing) | Monte Scheinblum's Blog

In [Kuchar's] takeaway he gets a nice width off the ball. This gives him the proper angle coming down. You can already see how he’s turning his right shoulder behind his body.

Effective Shoulder Turn – Matt Kuchar Swing Analysis

The role of the left arm in the backswing is...pretty much nothing. Your left arm stays right in front of your chest. You'll pull your right shoulder blade back, and the left arm will elevate a little bit. That's it.

Left Arm in the Golf Swing | RotarySwing.com

The takeaway actually starts with no wrist action at all. It should be a one piece move that is best performed by letting the right shoulder blade begin moving back.

Right Wrist Action for the Perfect Golf Swing – Herman Williams Golf

The right shoulder initiates the swing, while the right wrist follows in unison. When this occurs, the club's handle and the shoulder move together as a unit. This is known as swinging the handle, and it widens the swing arc going back.

Widen Your Arc to Increase Your Driving Distance - Golf.com - GOLF.com

The start of your first move is to draw your right shoulder and armpit area back towards your right heel--in a straight line. The completion of this move will place you in a position which features: The front of your shoulders closely in line with your right foot. Your shoulder blades facing the green or fairway area where your ball will land.

One Piece Takeaway (Part 2)

Another good way to [turn your left shoulder behind the ball] is by turning your right shoulder back on the backswing. Try this next time you are on the practice tee. Make some practice swings and try turning your right shoulder directly behind your head at the top of the backswing. When I do this, it is easier to get coiled behind the ball and it is easier to complete my backswing-it feels longer.

When you turn the right shoulder back, check to make sure the left shoulder is past the ball(or to the right of the ball). If the left shoulder does not get back “behind the ball”, then you may not be shifting your weight to the back leg at the top and will not have the power coming back to the ball.

Golf Tips - US Golf School Guide

Your first move away from the ball if you’re a slider is to ROTATE your right shoulder immediately behind you! This will get you turning and not sliding to the right. Once you feel the rotation in your core, you will be able to unwind with a much higher clubhead speed.

Fix Shoulder To Turn In Golf Swing

Start the swing with the right shoulder. This keeps the hands in front of the chest and guarantees a full shoulder turn. By initiating the swing with the right shoulder, the entire body stays connected. Conversely, starting the swing with the left shoulder doesn’t necessarily turn the right shoulder, creating a myriad of potential problems, chief among them, limiting the range of motion.

Start the swing with the right shoulder | My golf store

Another good feel for me on the backswing is to pinch my right shoulder blade in toward the middle of my back. This is my way of keeping my shoulders turning on a steep angle and making a full windup.

How To Make Your Swing Repeat: Matt Kuchar : Golf Digest