Full extension in the backswing and release is definitely something upon which I'm still working. I have a bit of "flippy wrists" and "collapsing arms" remaining in my swing due to my beginning golf instincts that I need to overcome.
Of course, the best way to help extension and thus width is to extend on the backswing by pushing the club as far away from you as possible using the right arm; this will also help increase distance and help with thin and fat shots, as the left arm will be fully extended coming down.
Part of making extension work is keeping the head behind the ball at impact; I have a bad habit of drifting past it, which contributes to the wrist flip release and loss of distance.
The ball focus should be on theinside of the ball (not the top), as if you're trying to hit it to right field. Finally, the club should be moving it's fastest about two feet past the ball, so this means one must accelerate through the ball (not accelerate AT the ball). As a matter of fact, a neat trick is to imagine that you're hitting 3 balls in a row starting with the first ball (the real one); this will encourage extension through the shot. Do this for irons and woods!
It is so critical to feel like you’re behind the ball at impact. Your goal to improve golf driving distance will not happen if you don’t do this. Most of us get ahead of it and end up throwing the club at the ball, instead of driving through it and getting a full extension like the pro’s get. Staying behind it is the ONLY way to achieve that full extension and maximum power through impact.
Overswinging and power loss occur when you collapse your elbows on the way to the top, which drops your hands toward your head. Instead, maintain a firm left arm and try to keep your hands as far away from your head as possible to create maximum width.
Golfers who move their swing center in front of the ball at impact will always raise up their spine at impact. So keep your swing center behind the ball at the point of contact.
The greater width you have in your backswing, the bigger your swing arc will be. This increased swing arc will give your swing more time to increase your club-head speed as you strike the ball. More speed means more power, which equates to increased distance. To increase width, you need to increase the spacing between your right hand and right shoulder (right-handed golfers) during your backswing. Practice taking a backswing holding the golf club with just your right hand. Keep your right hand as far away from your body as possible during these practice swings. During this drill, reach your right hand toward the sky at the top of the backswing.
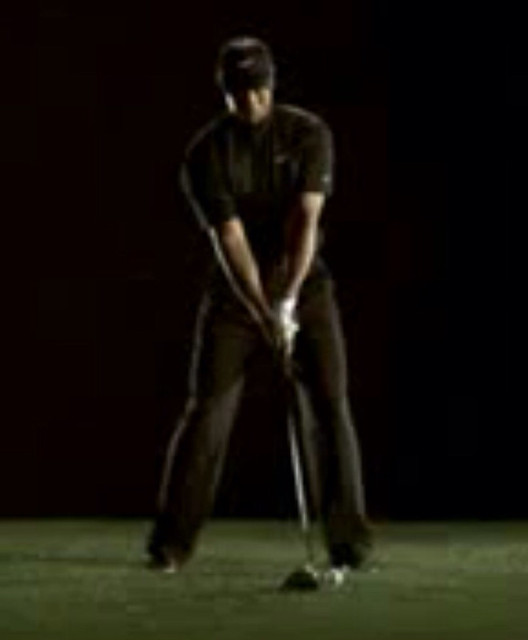
Rotational force is the most important fundamental of power. The more you extend your arms during the backswing and the longer they remain extended in the downswing, the farther you'll hit the ball. Watch Tiger Woods: He does this brilliantly, creating tremendous width in the backswing to set up a powerful arm swing through the ball.
As you start the club back, focus on extending your right hand away from the target, keeping the right wrist firm. This should prevent the right arm from collapsing and thereby narrowing the swing arc. This way, you create leverage on the backswing and store power for the downswing.
There are numerous ways to swing a golf club and hit a straight ball (by straight I mean possibly with a slight fade or draw). All methods require squaring the club face relative to the path in some way (i.e., mostly perpendicular to the path with maybe very slight open or closed face positions for the shot shape desired); some of those methods are active and some are passive. Active methods, such as rolling the arms, turning the knuckles down, or squaring up the back of the left hand, all require careful timing and skill to pull off consistently. Passive methods, such as using a stronger grip or a club face that stays mostly square to the arc with heavy body rotation, require less precise timing and are probably more suited to the weekend mid- to high-handicap golfer.
We've all been told that we need to swing inside-out to avoid coming over the top (OTT or swinging outside-in). Few really great golfers swing outside-in, though there are examples of pro golfers who've used a slight OTT move to good effect, such as Sam Snead. Killing the OTT move--apart from the open club face--is one of the first steps a slicer (most amateur golfers) needs to take. But what about the arc on the other side of the ball? Does the club REALLY swing "out to right field"? Here's where you'll see the divergence between those who actively or passively square the club face.
When a player actively squares the club face, the arms cross over and cause the toe of the club to quickly over take the heel, irrespective of the body's turn. Often the club will chase down the line (or even out over the line) after impact for a time before coming back inside, and such an inside move isn't very pronounced. A good player on a good day can make this work. But even good players struggle with this move and often end up with duck hooks on days when the timing just isn't there. This is what happened to Ben Hogan early in his career.
When a player passively squares the club face by trying to keep it perpendicular to the swing arc all the way through, the arms don't cross over actively. Any movement of the wrists and forearms is entirely unconscious. As a natural consequence of body rotation serving as a primary squaring mechanism, the club head immediately tracks back to the inside, such that the swing shape is inside-outside-inside, following a natural, crescent-shaped arc that intersects the target line at after impact. Whereas an outside-in swing shape is steep, the inside-outside-inside swing arc is rounder, flatter, and more shallow. The small muscles of the arms are taken out of it and the golf swing is powered more by the lower body and larger muscles of the trunk. It's easier to maintain lag pressure and thus lag, as the club head never passes the hands until very late.
Swinging back to the inside early is the way that Ben Hogan played golf later in his career, and many would argue that there has never been a more consistent golfer once he made this change. Hogan adopted a fade ball flight that was consistent and reliable; he never had to worry anymore about his ball hooking directly off the course. Other great golfers, including Jack Nicklaus, played a fade as their go-to shot. Matt Kuchar swings this way and is one of the most consistent modern players. This method of swinging really lends itself well to a slight fade or straight ball flight, with minor adjustments (mostly ball position) needed to coax the draw. Tiger Woods is trying to develop a fade ball flight as his go-to shot; you'll often see him practicing for a shot by exaggerating coming back to the inside.
Swinging this way works best with the correct hip movements (clearing the hips and covering the ball), and a good swing thought is the good old belt buckle--keeping the butt end of the club pointing at it as you turn through.
Want to know if you're doing it? Film yourself swinging down the line.If your club approaches the ball from the inside and the hands and club disappear behind your body low and early after impact, you have an inside-outside-inside swing shape. Another characteristic of this swing shape is the maintenance of connection between the left and right upper arms against the chest throughout the swing--often called staying connected. All of these characteristics make for a more consistent golf swing because no emphasis is placed on the conscious control of the small muscles in the arms.
Of course, the shorter the club, the less pronounced this move is, because the swing plane is more vertical and thus the inside-out-inside move is not as obvious.
As I said earlier, our goal was to take the timing problem out of my swing, including my hands having to roll over at just the right instant to square the clubface. Now, once I shift to my left side to start the downswing, I can turn hard, and my body will bring the club around. That's because I've kept my left arm pinned against my chest. With this connection, turning my body squares the face without any hand action.
With the body leading like this, my arms track back to the inside quickly after impact. I used to have too much "chase" in my swing, with the clubhead swinging straight down the line or even out to the right. My new swing shape proves that my arms and body are working together, like concentric circles, with my arms moving in orbit around my body.
Charles Howell III is getting back to what works for him. Howell relied almost exclusively on a fade when he was one of the game’s hot young prospects. After developing some bad habits while trying to incorporate a draw into his arsenal, Howell is back to the reliable left-to-right ball flight.
The main objective in Howell’s new swing? To get the club swinging more to the left after impact so the ball can start down the target line.
The plane of Howell’s old downswing looked ideal on video shot down his target line, but his club traveled too far in-to-out through the ball because of his steep, downward angle of approach.
“Because Charles hits down on the ball steeply, we had to have him swing more to the left to make the ball go straight,” Smeltz said. “We needed the club to approach the ball slightly more from the outside for the club to be traveling down the target line through impact. We had to get the club in front of Charles’ hands during the downswing. That got the club exiting more on plane and not swinging so far out to the right.”
The club orbits the body at an angle called swing plane – like a circle or ellipse tilted on its side. That angle can range from 45-60 degrees depending on the club. What most golfers neglect is how the club must travel back inside after impact. Instead of allowing a natural release to the left, they force the hands and arms to release the club down the target line in an effort to hit the ball straight or add more speed. This leads to inconsistency. In fact, releasing the club down the target line moves the club off its natural plane. The result can produce tremendous hook spin or block pushes depending on the angle of the clubface.
We hear this instructional catch phrase often: clear the hips. You also hear rotate the hips and bump your left hip toward the target and then turn. What should one really be doing? If you study professional golfers carefully from multiple angles in slow motion, you will notice that all of the above are true to one degree or another. What you might not pick up on is that more space is created for the arms to fall in front of the body than appeared to be there at address. How is that possible?
I briefly touched on this in a previous post on Shawn Clement's Braced Tilt. Good golfers keep their posteriors in a protruded position through impact, while high-handicap golfers (like me) tend to lose that protrusion established at address (in other words, the belt buckle starts looking up too soon). When golfers make this error, they may indeed shift to the left leg and rotate around the left hip, but the right hip gets thrown out over the target line and the shoulders arms and club soon follow (over the top).
This improper move is often called standing up through the shot and golfers are often incorrectly told that you didn't keep your head down or you looked up too soon. Doing this creates little room for the right elbow to fall back down in front of the right hip, and thus it's harder to approach the ball from the inside. I believe golfers like me develop this habit in a few ways: 1) the illusion that this is what pros are doing when you witness a swing from the front-on view; 2) the fear of striking the ground behind the ball or taking deep, painful divots, when ironically staying in the shot and covering the ball in the proper manner will shallow out the swing.
The correct move (as Clement eloquently describes) is that the right hip moves backwards, towards the target, and slightly upwards on the backswing pivot, with the weight on the inside of the right leg and right instep. This creates a "tush line" that is parallel to the target line with only the right hip is touching it. Now the key point. On the downswing, the left hip ALSO moves backwards to join the "tush line," while also shifting left and turning, such that the posterior remains protruded through impact; this protrusion is not lost until late in the followthrough. The right knee will kick in more behind the left knee instead of moving out too much toward the target line.
Moving the hips this way makes it easier to stay in the right posture through the shot; the chest will cover the ball and you will have more room for the arms to swing down and out. You will also notice that you finish your swing still in the correct posture and spine angle, as if laying one's head on a pillow. Done properly, there's no way to come over the top.
Shawn Clement, the Canadian golf instructor, starts off by demonstrating how one should perform a backswing hip pivot movement - by wiping the right buttock against the glass window in the direction of the target. That's a good swing thought for a beginner golfer who has difficulty performing a "correct" backswing hip pivot movement.
Note what he states about starting the downswing's lower body movements. He recommends that one keep the right buttock back where it was at the end of the backswing (at the tush line), and he recommends that one should think of pulling the left buttock back against the glass window and wiping away from the target (pivoting the left hemi-pelvis back and to the right, so that it is against the tush line). In other words, he is recommending that one should focus one's attention on the left hemi-pelvis, and he recommends that one should think of pulling the left hip back in a left hip clearing action - without allowing the right buttocks to move away from the tush line in the direction of the ball-target line.
In other words, a good "downswing initiating" mental image for a beginner golfer is to think of getting one's weight over onto the left foot followed by an immediate sensation of actively pulling the left hemi-pelvis back (away from the ball-target line) towards the tush line.
Another major area we've worked on is my hip action. Like my shoulders, my hips now turn on a steeper angle to the ground in the backswing. It feels as if I'm sticking out the right side of my rear end as I turn to the top. This move counterbalances my left shoulder turning down: If I didn't stick my rear end out, that steep shoulder turn would put me out on my toes. On the downswing, it's all about my left hip—actually, the left knee, thigh and hip. I want to feel them clearing out, or turning to my left, so my right side can drive hard. From the top, my hips used to thrust toward the ball, which dropped the club too far to the inside and led to pushes and hooks. Now I think about pushing my left hip out to left field and then turning it behind me (above). That keeps the club coming in steep so I can really pinch the ball off the ground.
I'm a huge fan of Shawn's teachings; plus, he's very generous in that he gives away tons of free instruction via YouTube. Due to his generosity, I send him a PayPal tip each month. You can find his web site here; he also offers very reasonable online video analysis and a DVD instructional series.
Shawn has a lot of great ideas and methods that are highly effective. His drills should be mandatory for every golfer, regardless of whether you agree with his instruction or even try his swing method. The drills include his classic perpetual motion drill,feet-together drill, and one-leg drill. You can use these to ingrain the fundamentals of the Clement swing, which in my opinion is focused on helping the novice golfer learn to stay centered, the opposite of which (swaying) may very well be the biggest error a beginning golfer makes. I've written about the pivot in several other posts, but Shawn's method may be the one to develop a consistent pivot and swing, resulting in fantastic compression and contact with relative ease. In a sense, most of the effort is spent in the setup fundamentals and the rest left to physics.
Shawn teaches "bracing against a firm left side" with the body tilting away from the target starting at address and all the way through the swing. This involves presetting some secondary axis tilt, such that more weight is on the left leg at address, the head is behind the ball (until well after impact), and the weight in the right leg is concentrated on the right instep (he describes the address weight distribution as 60% left - 40% right). The backswing pivot is more a turning of the posterior than anything else, and the slight backwards weight shift is concentrated on the inside of the right leg and inside of the right foot; there should be a feeling of pressure ONLY on the inside of the right leg and right instep, and the right knee and right hip should feel "locked" in place briefly at the top, before the transition of weight back to the left leg. Another description is that it feels like sitting back on the right leg, so you should really feel it in the right hip.
Before you start thinking this is Stack-&-Tilt, it isn't, because Shawn teaches a backward and forward weight shift during the backswing and downswing, respectively. It's just that the weight shift he describes is very minute; he states that it is "about an inch long." I would describe it as: address, 60-40; backswing, 50-50 (or maybe 45-55) onto the inside of the right leg due to the weight of the arms and club; downswing, 60-40; and finish, 95-5 (again due to the weight of the arms and club). By contrast, S&T has the golfer starting 55-45 and leaning left at address, with no weight shift on the backswing (the upper body continues leaning left throughout); the weight favors the left side at address and progresses more and more left until the finish.
Shawn's swinging motion is passive and he describes it as "assisting momentum towards a target." In other words, one tosses the "arm-club unit" to the right on the backswing (the club feels somewhat weightless at the top) and then one allows it to fall on the downswing, with one's posterior providing a counterweight to the swing. In a sense, the golfer is setting up as a crane or catapult, and the butt acts as the means to propel the club. Shawn even says that the downswing weight shift "happens behind you," such that the butt moves left ("about an inch long") to shift the weight back into the left leg before the club comes through. The right butt cheek moves backwards on the backswing, and then the left butt check turns back to join it in a line on the downswing.
The result of this swing method is a tighter, circular motion that doesn't waste as much energy, and a stable low point. This results in increased consistency, compression, power, and divots in front of the ball.
Characteristics of Shawn's swing method include hips that turn nearly as much as the shoulders (don't go looking for McClean's X-Factor here), head staying behind the ball, arms and hands staying in front of the body, left foot prevented from spinning out, right foot staying planted longer, left knee ticking in towards the right leg on the backswing (even at address), allowable head movement, left heel unconsciously coming up on the backswing, passive arms (i.e., tossing the arms to the top and letting them fall), wrists that hinge naturally up-and-down due to the club's weight (i.e., float loading), and a takeaway that begins with a slight leftward move, as if one is already in motion at address (hence the perpetual motion drill). Shawn feels that a slight move that mimicks a throughswing as a starting motion (catching the next backswing) is best for keeping the swing relaxed and effortless.
My personal experience with this method is that it really adds distance and makes the golf swing "easy." However, I start coming off the rails with this swing by producing fat and thin shots, and the reason is two-fold: 1) there MUST be a move into the right leg on the backswing (even if it is very slight), and the correct feeling is one of pressure on the inside of the right leg with the right knee and right hip locked in place (i.e., I can occasionlly get too frozen over that left leg in the backswing); 2) the head--it must start behind the ball at address and remain there until post-impact (this one goes along with the first error--keeping the weight too left on the backswing can have the tendency to cause the head to be too far left).
Passive arms:It's important to simply get to the top and leave the hands and arms there, especially with the driver. Toss the arms to the top and then let them fall and/or move in response to the lower body's movement. Don't do anything else--pull or push. Allow the arms to simply drop and whip through in response to the lower body motion. Any attempt to consciously or unconsciously steer, pull, push, or guide the club will contribute to errors. Picking up on this in oneself is difficult because the difference between steering and just letting it happen is very subtle.
I have so many videos that explain what you are asking here; they all start with "Braced Tilt", "Braced Tilt Part 2", "Tilted Spiral" part 1, 2 and 3 and my latest, "Feel the Braced Tilt" which will explain so much for you; it all comes down to 60% on the lead leg; Use the trail leg as a support post to keep you against the led leg which is your leaning post.
Hang around online long enough and you'll discover a plethora of golf teachers with varied opinions on the role of the right arm in the golf swing. Some teach that the left arm should be dominant (players sometimes called "swingers" who pull with the left arm), some argue the right arm (players called "hitters"), and some both ("switters" or "swing-hitters"). Some say that both arms should be passive, neither pulling or pushing, and merely responding to gravity and body movement.
And you'll find examples of successful touring pros who use each one. In The Golfing Machine (TGM) parlance, the active straightening of the right arm (primarily driven by the right tricep) is described as using Power Accumulator (PA) #1 and is heavily associated with the "hitter" swing style.
Regardless of what is taught, used, or believed, there seems to be one universal truth, at least visually, with regard to the right arm in the full golf swing when we examine the swings of great players: The right arm folds in two places--the elbow and wrist--in the backswing, and the right arm gradually unfolds in the downswing, reaching it's fully extended, released position (right wrist and elbow straight) a foot or so past impact. The left wrist never breaks down or bends backwards (i.e., flips). The right arm straightening can be passive for swingers or active for hitters.
The first element of properly using PA #1 involves keeping the elbow and wrist of the right arm bent for as long as possible coming down. Ernie Els describes this as "keeping the box." The right elbow should still be slightly bent at impact, reaching a fully extended, released position only a foot or so past impact, with the right wrist still bent backwards (even just after impact). Doing both automatically extends the left arm fully and keeps the left wrist flat through impact. Pressure should be felt in the first phalanx or base knuckle of the right index finger from the top and through impact. In a sense, that phalanx or inside base knuckle of the right index finger can and should serve as a guide to the club face position throughout the swing. The right hand thumb and index finger should be completely loose around the club handle; you can even take them off! Only that phalanx or base knuckle is important.
If the right wrist straightens in a way that causes the left wrist to bend backward at impact, this creates a "flipping" motion and the club head will pass the hands (lag is lost and the effective loft of the club is increased). Instead of "flipping" or swatting at the ball with the right wrist (behaving as if it was merely a door closing along its vertical axis), the right wrist should only straighten WELL AFTER impact with the right palm rotated slightly downward through impact.
This reflects the TGM description of hitting down on the ball with the right palm and actively straightening the right elbow, feeling pressure in the base joint of the first finger of the right hand (Pressure Point #3) and pressure on top of the left thumb (Pressure Point #1) due to pushing on the left hand with the right. This creates a feeling of pushing down and out on the shaft with the right palm, and results in a flexed shaft due to the compression against the ground; a divot is taken well in front of the ball. The ball is often described as being powerfully "pinched" off the ground or "compressed against the ground."
Use this one swing thought: Aim to fully, dynamically straighten the right elbow a foot or so past the ball with your irons. Straighten it down, forward, and out. You can use this method to hit the driver; simply use less downward extension. Instead, extend so that the right forearm is more level with the ground coming into the ball. Straighten it out to the right slightly for a draw and out to the left slightly for a fade.
The best way to describe [Kenny Perry's] right arm on the downswing is that it is "pushing down and out." Pushing down allows the right arm to actively straighten while maintaining the bend in the right wrist. This feeling is no different than if you were to try to push something into the ground with your right arm.
Maintaining the bend in the right wrist is a fundamental you see in a good swing. It allows the clubshaft to return forward at impact, resulting in a clubhead that is descending and accelerating through the impact zone.
"In essence, bending and straightening the Right Elbow will raise and lower the left arm and/or cock and uncock the left wrist without bending, flattening, or cocking the right wrist. Right elbow action either powers and/or controls all three elements of the Three Dimensional Impact, (downward, outward, and forward)." ~ Homer Kelley
In a golf swing (whether one is a hitter or a swinger), the right wrist is always bent back and the right wrist never bends forward (palmar flexes) at any time point during the downswing - because it would cause the left wrist to bend forward (flip).
Whether one is a hitter or a swinger, the clubhead should never flip past the hands while the clubhead is moving through the pre-impact zone. The clubhead should always be lagging behind the hands during the entire downswing, which means that the right wrist is always bent back.
[A] hitter applies an active push-force at pressure point #3 by actively extending the right elbow during the downswing - as the right elbow actively straightens it applies an active push-force via the bent right wrist to pressure point #3.
PA#1 is only actively released in a hitter's swing action - when the right triceps muscle actively contracts with a large amount of isotonic force, thereby straightening the right arm in a straight line thrust action that thrusts the right forearm downplane and drives PP#1 [the left thumb]/PP#3 towards the ball (or towards a desired aiming point in the vicinity of the ball).
The release of PA#1 is due to a very active triceps muscle contraction that actively straightens the right elbow in a forceful thrust action that pushes the right forearm and bent right wrist towards their impact fix position.
Throw the club through the ball with your right hand. As Jack Nicklaus said, you can hit as hard as you want with the right hand as long as the lower body is leading.
That right hand does not stay as loose as it does on your backswing. You take it back loose, your hands are nice and flexible. But when you hit that ball, you’re adding power to it and you’re increasing your pressure all the way through impact.
There's another very important, fundamental aspect to the golf setup, and this time it has to do with the arms and elbows.
When establishing the address position, one must absolutely ensure that the arms are straight. I don't mean tense and ram-rod straight, but the elbows should not be bent to any extent, and both elbows should be located relatively close together, pointed down towards each respective hip, and the hands and club in the middle of the torso.
The upper arms should be lying tighty along the sides of the chest (especially the left arm), and this feeling will vary depending on the thickness of the golfer's chest and upper arms. This is the feeling of "connection" that should be maintained throughout the swing, where the arms are moved by the torso turn--not the other way around.
Some instructors have stated that the upper arms should rest across the top of the chest (and I use to believe this), but I now believe this is incorrect--at least for me. I get much better results by pinching the upper arms into the side of the chest and leaving them there for as long and as much as possible.
Elbows close
Getting into this position establishes the triangle at address and ensures the arms maintain the width and radius established at address. Keeping the elbows straight and close together also keeps the arms always in front of the body during the swing!
When done properly it's as if the arms and club are moved by the torso during the swing! If the arms ever begin moving independently, they will start sliding on the torso...or worse, coming off the torso altogether.
Establish these arm positions away from the ball and then use foot/stance adjustments to "move the crane" to the ball; in a sense, the arm-club unit then acts as a measuring stick to attain the correct distance.
To make it work, take your address position and place a soft ball about the size of a volleyball in the gap between your elbows. Take some small, relaxed swings, taking care to keep the ball in place. Try to keep your arms relaxed and only take half-swings or less.
We do not want loose arms or elbows that crook and point outward, left and right. These lead to a loose and sloppy swing.
The arms should be very nearly straight, though by no means locked. The elbows, especially, should be pointed down, toward the ground, not out to the sides.
You will notice, if you put the elbows in this position, that the very act of doing it brings the arms and the elbows closer together.
At address, the arms should be held close together in front of the body, and the back of each elbow should point at each related hip. One should avoid allowing the elbows to point sideways away from the body, so that the antecubital fossa (hollow in the front of the elbow) of each elbow faces towards the opposite elbow's antecubital fossa.
The final step in our setup is to simply march over to the golf ball. From the setup position with the clubhead resting on the ground at the center of the stance, simply shuffle over to the ball while maintaining setup posture. Basically we create the setup while standing a few inches too far away from the ball, then slide the clubhead up behind the ball as the feet take a small step forward. We literally use the club as a yardstick to measure the body distance from the ball.
The right foot may be something about which you've never thought. It simply comes up on the toes during the downswing to accommodate the weight shift, right?
Well, studying the feet of some professional golfers during their downswings might just pay off. Look at golfers like Rory McIlroy, Kenny Perry, Ben Hogan, and Jason Dufner. As it turns out, some of the best ball strikers in history worked to keep the right foot planted for as long as possible during the downswing. In other words, the back foot may roll inward slightly towards the inside of the toes during impact, but the foot should only come up on the tip toes at the very end by being forced up by the finish. You should never TRY to come up on the toes through impact; if this is a habit you ingrained early, you'll be doing a good thing to try to reverse it. Why?
Set up like you're going to hit a ball and begin coming up on the toes of the right foot during the downswing (through impact). Notice what happens with the hips. They open up sooner. Keeping the right foot planted longer through impact keeps the hips from spinning open agressively too early and prevents the angle of the pelvis from improperly changing. The primary and secondary spine angles are retained during the turn-through.
It's important to couple this with the proper shoulder plane rotation. Done properly, the knees will finish very close together; otherwise, you will notice a larger gap between the knees at the finish.
MY RIGHT FOOT STAYS DOWN
This is more evident when I hit my irons, but I keep my right foot on the ground for a long time during the downswing. It helps my stability and lets me create more leverage to deliver a lot of energy into the ball. Plus, if you get up on the toes of your right foot too quickly, you can bet the club is not staying in front of you. Think about keeping your back heel grounded for as long as possible as you swing down. You'll be surprised how well you start striking the ball.
One of the parts of the swing I like to see is when a golfer has a right foot that is flat at impact or close to it. Granted, with longer clubs this is less necessary and more difficult to accomplish, but if you can get somewhat close then that's pretty good.
In the next sequence, it is clear to see that my right heel is still very low to the ground, but the entire foot has rolled up off the rope and in toward the left foot.
If you're a "hip spinner" as I discussed in the Hip Spinners video, doing this will create a sense of being "anchored" to the ground and provide a refreshing sense of stability at impact.
The right foot is actually a reaction to a good swing. If you stay down, the foot will SLOWLY rotate without coming up too quickly. The other option is the foot comes up and out too quickly and you will most likely hit a slice or block.
I've noticed that I can set up to hit a driver with the shaft leaning too far forward when I'm not paying attention, with the club shaft pointing at my left hip. The mishits from a shot like this include fat shots and pop-ups, because this sort of setup encourages a downward hit into the ball. With the woods, we want an upward angle of attack.
If you look at video or photographs of professional golfers showing their driver setup positions, you will notice that most set up with their hands directly over or just behind the club head (and thus ball) at address, and the club shaft is either vertical or leaning slightly away from the target. The club shaft will point at the belt buckle or just to the left of it, and the angle of the club shaft matches the angle of the left leg. In other words, the club DOES NOT lean towards the target as it does for iron shots.
Setting up with the shaft vertical or leaning very slightly away from the target will encourage a sweeping driver or wood swing rather than a downward driver swing, which is encouraged by the opposite setup. To reach this position, don't move the arms; rather, adjust the stance to get the shaft (and thus ball position) adjusted properly.
Remember to keep the shaft pointing towards the belt buckle and this will assist in getting the driver shaft in the correct position. Also keep in mind that ball position in the stance is directly associated with the degree of shaft lean, either forward or backward, at address. The ball position for the driver should be relative to the hands and upper body, not the feet, and poorer players tend to push the ball position to far forward, especially when hoping to hit a push-draw.
It's important to experiment. It's possible that a hand position very slightly forward of the ball with a driver might assist in hitting inside-out and promoting a push-draw. Taken too far, however, will cause fat shots, pop-ups, pushes, and push-slices.
So if your hands are ahead at address, they will try to be ahead of the ball at impact promoting a "compression" of the golf ball equaling more distance and accuracy. The backward lean of the driver will promote a "sweeping" of the ball off the tee to create the optimal launch angle for your drives.
One of the most common errors with the driver is to lean the club shaft too far forward. This club shaft alignment promotes a steep attack angle, robbing you of power and accuracy. Rory [McIlroy] is a great example of someone who doesn’t lean the driver forward at address, allowing him to get behind it and achieve the necessary attack angle.
The shaft of the club will appear to lean slightly toward the target with your short irons because the ball is positioned in the center of your stance. With your middle irons, the shaft of the club will lean only slightly toward the target (or not at all) since the ball is forward of center. With long irons and woods, your hands and the shaft of the club will appear to be in line. Again, as the ball position moves forward, the hands stay in the same place so the lean of the shaft disappears. With a driver, the shaft will lean away from the target.
With the driver, most golfers play the ball too far forward and stand too far away from it. This might feel powerful, but it sets some bad things in motion.
A lot of people have the yips when they putt. But I don't think people realize that they can have the yips (or a flinch) with any golf shot, including full swings. I've been a victim of this, and you must really pay attention to yourself to catch it, because it's very subtle and insidious. It often occurs right at impact or anticipation of impact.
I call this full swing yipping phenomenon "the flinch." Yips usually involve just the hands and small muscles in the forearms, but the flinch can involve muscles in your entire body. I've flinched with my left shoulder. I even flinch with my legs--even to the point of lifting with my legs and spinning out my front foot, and part of me believes that this is left over from my tennis days. In reality, it's just tension that tries to release itself at the ball, and a flinch swing is really the opposite of a smooth swing. The tension can be due to a variety of reasons, including the effect that the golf course's hazards and obstacles have on the psyche (e.g., a long forced carry over a lake, etc.).
In a smooth swing, the small muscles of the hands and forearms don't activate. This means there's no conscious or unconscious attempt to add power to the shot, rotate the forearms, flip the wrists, or any number of other handsy movements. But a smooth swing also means a smooth lower body. The left foot doesn't spin open from its address position; the legs don't try to unconsciously add lift to the shot. It's a smooth, gradually accelerating motion of the lower body that should move passive arms.
There are probably other movements I'm missing. Heck, for all I know I'm probably gritting my teeth, flaring my nostrils, and raising my eyebrows at impact. All are signs of tension and denote a high potential for flinching at the ball and causing crazy mishits.
Ironically, a slower, smoother, rotational swing imparts far more energy to the ball than a faster yip swing that uses small muscles and causes mishits. It's like a lot of things in golf--the opposite prevails. The mind must learn that a smooth swing without small, jerky movements of the twitch muscles will give the ball it's best distance and direction.
I believe that part of beating these flinches is to first realize that you're doing it, and this requires an ability to be aware of yourself and body through the swing. If you mishit a shot, ask yourself immediately if you flinched or not. Chances are you probably did. When addressing the ball, remind yourself to relax and not flinch--especially in situations where you fear hitting the ball short or too far wide and into a hazard. Try different grip pressures, grip more in the palm with the left hand (and more in the fingers of the right) or even trusting your setup and not looking at the ball (something like this worked for Hank Haney's driver yips). Thinking of your swing as having perpetual motion (as Shawn Clement teaches) might help reduce flinching at the ball.
She recalls starting to flinch in her swing during her junior year of college, right after coming off of the U.S. Women’s Open. Following that tournament, she first noticed she was flinching through impact, better known to amateur golfers as the ‘yips.’ Instead of taking a step back and figuring out what was causing the flinch, she continued to play through it. She assumed it would solve itself over time. The flinch progressively got worse. It became mentally draining for Henderson, but she refused to stop competing.
In the latest Golf Illustrated was a good article called Quick Fix for the Yips by Stephen Aumock as he states that this word can cause a chill to go down your spine if they feel this is happening to their putting stoke. As the article states that most golfers don’t realize they have it and if they do they seem helpless in ways to fix it.
I know my son who is a great golfer has had this problem and he has tried everything from going to the long putter and tried different methods to help him to relax. This author attempts to give some suggestion on how to overcome this affliction. He mentions the Yips can happen in all sports, from baseball to basketball so it isn’t all in golf.
Many amateur golfers flinch at the ball at impact. They have a very free-flowing practice swing, but when they get up over the ball their swing looks completely different. I called this a hit impulse. The hit impulse is the moment you put a ball in front of you, you hit at the ball instead of take a full swing through the ball. A good friend of mine used to call this chopping wood. I don’t think I would consider a hit impulse full-blown yips with your swing, but is a very close cousin.
Small spasms or twitching of the muscles in the arms at impact causes an unpredictable clubhead movement, just as you see with the putting yips. When you suffer from the yips, the way your brain and muscles controlling your hands communicates is disrupted somehow, causing you to unintentionally move the club in anticipation of contact. As you would with the putting yips, you need to change the way you perceive the point of impact either mentally or physically.
Try different gripping styles with or without overlapping your fingers and see if this helps. Start by aligning your fingers onto the grip or squeezing the grip with your palms and then wrap your fingers around it for support. This can change the way your brain interprets the signals it receives from your hands. The simplest way to cure the driving yips is to change your preshot routine trigger. For example, one golf pro says that her trigger is to touch her golf bag and it mentally prepares her to swing. Try changing your key thoughts as you swing. These are thoughts you use to improve your swing; such as, keep your head down or make a full follow through. Most people watch the ball as they make contact and think: keep your eyes on the ball. One thing you could do is to start staring at your nose instead of the ball. This requires that you trust the way you set up to the ball and your swing. The benefit to this is that it reduces your anxiety or simply changes the way your brain interprets the swing in hopes to prevent the yips.
The technical name for the yips is focal dystonia—and changing where you focus your eyes can help solve the problem. Hansson had him hit balls with his eyes closed so he could focus on a different feel in his release.
However, Hank eventually developed the bane for his demons. He changed his grip, incorporated a bizarre pre-shot waggle and avoided looking at the ball. You read correctly, he found the ball to be distraction to his swing!
"Swing faster for more distance." This is a refrain that we've heard from many instructors; Hank Haney recently told Joe Namath (The Haney Project) to speed it up and swing "OUTSIDE" himself. He was pointing out to Namath that he was capable of far more club head speed than he was demonstrating. I've had my beginning swing speed measured at about 84 mph on average, and I believe that's on par with many golfers at my level of play. With my driver, I can hit it about 210 on average, which isn't really great.
Physics backs the notion of velocity adding much craved distance. For every extra mph, about 2 yards in distance is added. But how to add speed the right way?
We see players like Ernie Els swinging in apparently slow motion but with clubhead speeds well in excess of 120 mph. How the heck do guys like Els and Couples, with their languid, lazy looking rhythms, manage to hit the ball so far? These guys take 9-irons and hit them 150 yards. How do they swing slow and lazy but obviously still generate club head speed?
When I think of swinging fast, the first thing my subconscious brain tries to do is throw the club from the top really fast. And this causes mishits, OTT moves, slices, and no end of other errors, because as Namath said to Haney: "I'm trying to swing WITHIN myself." Haney was trying to relate to Namath that his swing was too slow where it counts--down in the impact area at the bottom.
In other words, a violent transition and adding speed too early will cause errors and the swing will ironically slow down before it gets to the ball. We need to start down SLOWLY and gradually add speed in the right place.
Shawn Clement had a beautiful swing analogy for speed. When pushing a child on a swing and satiating the child's desire to go higher and faster, the adult must ASSIST MOMENTUM where it makes sense--AT THE BOTTOM! The adult gives the child a gentle but firm extra shove at the bottom to increase the speed. When thought of this way, it's easy to see why many of us amateur golfers screw up the speed part and lose distance or accuracy or both. Applied the analogy above, we might kill the child with this way of thinking.
You can swing "within yourself" (with an Ernie Els-like rhythm) and still get the club head moving through impact 20 mph faster than you do now. You'll be more likely to keep some accuracy while adding distance. Start down slowly and gradually add speed at the bottom. This feels very subtle, gradual, and dynamic.Use counting rhythmic meters at a moderate tempo to help pace your swing. Just think of Clement's swing analogy and practice it that way. This also will give you two speeds to swing every club: your "normal" pace, where you get moderate distance and your "boosted" pace, where you get extra the distance.
You must also ensure that you're creating a wide swing arc going back and extending fully going through; really concentrate on straightening the right arm as the torso continues turning left. (Updated 1 Mar 15)
Simple: speed. Adding extra miles per hour to your swing is the only thing that's going to allow you to hit each of your irons farther. Most amateurs think of speed as something they generate from the top, but that's a recipe for almost every bad shot you can imagine. The secret is to maximize the fastest part of your swing, and that comes after you strike the ball.
I wrote before about my wacky left shoulder hitch. It's not my only downswing hiccup, however. This particular one--the subject of this post--can really destroy one's game unless one has a lot of talent (like Bubba Watson or other pros who can spin out and play well in spite of this error).
I had unconsciously ingrained the habit of turning my left foot outward during my downswing, such that my toes were pointing more toward the target than they were at address. I would address the ball with both feet flared out slightly (left over from the S&T days), but I would then unconsciously spin my left foot more open, so that the toes pointed more towards the target midway through my downswing. When I concentrate, I can keep it from moving during my downswing, and as a result my impact is much, much better. For me, I believe moving my left foot is just a bad habit more than a flexibility issue.
The position of the feet at address can be used to assist in creating different ball flights. Keeping the left foot perpendicular while turning the right foot out a bit can assist with hitting a powerful draw. Reversing this can help hit a fade, but it's important NOT to move that front foot once it's position is established at address, regardless of how open it is at setup.
If you're observant, you'll notice that there are a few touring and teaching professionals who allow the front foot to spin out--some significantly--on the downswing, such as Bubba Watson. But I believe they're great inspite of this error; we amateurs can't afford to allow this to happen. Another interesting point: Most teaching professionals espouse a front foot that is positioned anywhere between 20-45 degrees open (seriously...does one get out a protractor to measure this?), while the rear foot (right foot) should be positioned perpendicular to the target line. However, like most "fundamentals" of golf, you'll find teaching pros who advocate the feet positioned in every possible combination: left flared, right straight; left straight, right flared; both flared; both straight. Hogan advocated for a flared front foot and square back foot (probably why most instructors teach this), but keep in mind that Hogan also fought a hook, so much of what he taught in his famous Five Lessons book were keys to hitting a controlled fade and avoiding the uncontrolled duck hook.
Spinning the left foot outward during the downswing from its initial address position can affect weight transfer to the front foot and throw one off balance. It can cause a slice, pull, or pull hook, as the downswing path is suddenly thrown--even if minutely--off to the left; as the left foot spins open, it sets up a chain of movement from the ground up that adds more leftward downswing rotation (knees, hips, and shoulders in that order), which can exacerbate a slice or pull. Ultimately, this can affect the quality of impact, reducing distance and causing various mishits. One sign that the foot moved (other than simply being aware of it happening), is that it's impossible to maintain a balanced finish. A balanced, solid finish usually means the front foot did not move--or move much--during the swing.
Keeping the left foot in the same position from address to finish can be critical in ensuring a solid, compressing strike on the ball. This is what is often called hitting into a firm left side.
Here's an interesting theory: Keeping the rear (right) foot pointing straight ahead at setup (perpendicular to the target line) and the left foot slightly flared out may, in fact, prevent the left foot from spinning open during the downswing, whereas flaring the right foot and left foot may actually contribute to a left foot spin out on the downswing. Flaring either foot eases hip rotation in that direction, so a more rotated pelvis in the backswing (not desirable--see the much maligned "X factor") could increase rotation on the downswing, causing the left foot to spin out. Because the keeping the right foot perpendicular at setup decreases hip rotation on the backswing, it also helps prevent a sway to the right; likewise, a left foot that is too open at setup can cause too much forward sway or hip slide in the downswing.
Either way, you should experiment with keeping either the front or rear foot perpendicular at setup to see how it affects ball flight and improves power and stability. For a standard shot off the tee box or fairway, I feel one foot or the other should be perpendicular at setup; both feet should not be simultaneously flared out nor both perpendicular, though you can find any variation of these taught in golf. Remember that flaring the front and not the rear can increase the chance of hitting a fade or even OTT (in this case, pull the right foot back a bit--especially for longer clubs [see Hogan's image above]), and the opposite condition can increase the chance of hitting a draw or a push.
Make certain that you recheck the alignment of the knees, hips, and shoulders when adjusting the positions of your feet. For me, flaring the front foot while straightening the rear foot caused my hips to open without me realizing it. I started hitting it better once I re-squared my body alignments.
As most trouble shots require a stable lower body (for instance, in a fairway bunker), keeping both feet pointed straight ahead or even turned in a bit will limit the turn back and turn through of the lower body and increase the chance of solid contact and a good escape over power and distance.
This ideal weight shift allows these players to deliver the clubhead squarely into the ball at impact as they rotate powerfully around the front foot.
Does your left foot stay stable throughout your golf swing? Does it move, and if so, which direction? It can move incorrectly three ways during motion or a combination of all three. On simple terms, it can move incorrectly, side to side, rotational, and forward and back. Fix the most dominant mistake first!
If there is too much rotational movement in the foot, practice off a dry erase board on socks with some pledge for more difficulty. Objective, don't let the foot rotate during the swing.
The two stabilising points are the head and left foot. The head must be kept back behind the ball, and it must act as the upper stabilising point while the left foot represents the lower stabilising point.
The two main ingredients in a golf swing that are responsible for hitting against a firm left side are the head staying still and the left foot set correctly at address.
The head should be tilted back slightly at address anchoring the top half of the body. The left foot must be positioned almost at right angles to the target, this anchors the bottom of the body. All too often club golfers open up the left foot too much. These two small adjustments at set up can have a dramatic effect on hand speed at impact.
One of the common mistakes golfers make is to allow their left foot to spin out as they hit the shot. This leads to inconsistent golf ball striking and errant golf shots.
Since Hogan wrote the Modern Fundamentals it has been popular to open the left foot at address a quarter turn. But turning out the left foot too much can make a slice worse. Rather than being able to hit against the left side, which encourages a full release of the club, if the left foot is turned out too much there is nothing to stop the shoulders spinning open.
You have to setup with your feet in a certain configuration. What I noticed is when I told my students to do this drill with no additional instruction. They almost always setup with [their] LEFT foot flared toward the target.
To get maximum benefits you should setup with your left foot perpendicular to the target line, and your right foot flared away from the target. You should also drop your right foot back slightly. Just check out the picture below and copy the feet position.
The left, or front, foot is always turned out slightly to the left. With the foot in this position, a player can transfer their weight to the left side more easily and quickly on the downswing. They can also hit through the ball with greater power and comfort because the directional force of the swing is toward where the left foot is aiming—to the left.
Position the right foot so that it points almost straight ahead. A common mistake is to address the ball with both feet pointed out, whereas only the left foot should be in that position.
With the right foot positioned so that it points ahead, or almost so, instead of to the right, the weight shift on the backswing becomes more centralized around your spine rather than on the extreme outside of the right leg and right foot.
At address, my right foot points perpendicular to the target line, but my left foot flares out almost thirty degrees to the left. That's a lot. The reason I do this is that it helps me get my left side out of the way and turn fully through impact. The flip side of this is that the flared-out left toe restricts my hip turn away from the ball and thus limits the length of my backswing. That's not a liability for me, however, because I've been blessed with a supple body.
If you have trouble turning through the ball, I recommend that you experiment with this flared left toe. Just be careful not to allow the alignment of your feet, hips, and shoulders to open.
Conversely, if you want to make a more full and free turn on your backswing, try experimenting with a flared right toe. Just bear in mind that this can inhibit your turn through impact.
There is always lots of discussion about whether the feet should be flared, square, turned in, etc.
Just like most things in the golf swing, it is very individual and dictated by how you swing the club and what mistakes you make or physical limitations you have.
To me, the right foot (back foot for righty) should never be flared intentionally. It can cause over rotation and getting the club behind you and it can also make it difficult for your lower body to clear in sync with the shoulder turn.
The left foot (front foot for righty) has a more flexible range of how to place it. Many people get a great benefit from flaring the left foot to give the lower body more room to clear. Those with over active lower bodies that get out in front and get the swing out of sync, may benefit from a square or turned in left foot.
I can’t tell you individually what to do, but you can use this info as a guide to tinker yourself.
However, if the left foot is turned back so it is at right angles to the target, it encourages the correct transition between backswing and downswing. The shoulders can’t spin open too much as the left foot anchors the whole of the left side.
The more the left foot anchors the hips and consequently the shoulders from spinning open, the club will approach the impact area more from the inside.
To do this, dig your feet into the sand, then turn your toes inward as you take your stance. This secures your lower body in the bunker. Your weight should feel as if it's on the inside edges of your feet, and when you swing, keep your weight in that same position. Unlike a normal full-swing shot, there's not a lot of weight transfer.
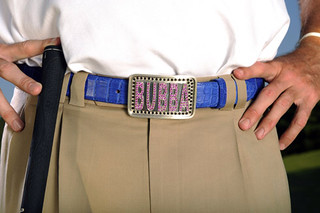
I've written about the belt buckle in previous posts on golf's triangles and always keeping the club in front, so I thought I'd write a little bit to unify the ideas, especially since this can be a key swing thought. This may be the most crucial golf swing thought for the full swing. Simple swing thoughts are best, and using the belt buckle is one way to unify a lot of swing thoughts and fundamentals and keep the approach to golf as simple as possible.
Your belt and belt buckle--especially when related to the butt end of the club handle--can show you a lot of things.
First, the belt buckle shows you whether you've made a good setup posture and address position. As Brian Manzella has stated, the belt buckle should point down toward the ball at address (at an angle) and the butt end of the club should point toward the belt buckle. It's almost as if your club is an extension of your belt buckle; in a sense, your belt is a loop around which the swing is powered. This will ensure that you have the correct pelvic tilt (i.e., protruding rear end) and that the club (and thus hands and arms) is in the correct orientation.
Second, the belt buckle shows you how to do a goodtakeaway or pivot back. In the beginning of your swing, the belt buckle and butt end of the club should maintain a close relationship. That is, the butt end of the club will continue pointing at the belt buckle, or remain close to the belt buckle, during the takeaway. Only once your club reaches waist height should the wrists begin hinging the club upward; the butt end of the club will begin to point down the target line but will still be in close proximity to the belt buckle, before the right arm folds into the full backswing. Think of the club shaft as an extension of the belt buckle in the takeaway.
Third, the belt buckle leads the downswing. As the downswing begins, the club's butt end and belt buckle become the most disassociated, with the club handle trailing the belt buckle. During the swing, the butt end of the club and the belt buckle quickly and dynamically become reassociated at impact, when the left arm and club reach an inline condition. In other words, the club handle quickly catches up with the belt buckle through impact. The club and hands finally pass the belt buckle on the followthrough and fully disassociate again at the top of the finish. Simply moving the belt buckle over your left leg WHILE AT THE SAME TIME turning the belt buckle to the target (while the shoulders remain closed and arms remain unengaged) may be the best swing thought for the downswing, as this reflects starting the downswing from the ground up (i.e., leading with the hips). Think of the club shaft as an extension of your belt buckle and imagine you're hitting the ball with your belt buckle (as if a club was extending from it). This thought will help you time the arms with the body and not get stuck (arms trailing too far behind); in other words, this thought is great for properly synchronizing the arms with the body rotation. Remember, the club shaft and belt buckle disassociate and reassociate based on vertical movement of the arms from the shoulder joints, not horizontal movement; the club, hands, and arms should always stay in front of the torso!
Finally, the belt buckle shows you where your ball is heading. Turn the body through so that the belt buckle points towards your starting line. If your belt buckle points right at the end of your swing, your ball is likely starting there (with the right spin, it may not end up there). Same thing if pointing left.
Another way to consider this concept is to visualize a 4-inch elastic cord connecting the end of your club to your belt buckle (there have been similar training aids available on the market). At address and during the takeaway, the 4-inch distance is maintained, but the cord begins to stretch in the backswing, creating stored energy. As the belt buckle dynamically turns towards the target and the left leg straightens, the energy is released and the elastic cord quickly returns to its original 4-inch length at impact (when the left arm and club reach an inline condition). Finally, the cord again stretches on the followthrough and to the top of the finish.
The belt and the belt buckle is a terrific alignment tool you can legally use on the course for a number of good things in the address position, posture, and swing. The butt end of the club handle (and thus the hands) are closely associated with the belt buckle in the takeaway, slowly disassociated from it to the top of the backswing, and then QUICKLY reassociated with it through the downswing and into impact. Then they dissassociate again on the other side. But remember, the hands and club handle should be close to the belt buckle again at impact (almost as if extending out of it, center-mast)!
In order for your belt buckle to point at the target on your finish, you must rotate your hips powerfully through the ball on the downswing. Powerful hip rotation alone, however, is not enough. You must also have a proper release and good lag on your downswing. But one of the easiest things to think about and visualize is where your belt buckle ends up as you complete your swing. Therein lies the power of the tip.
At impact the golfer’s belt buckle will have shifted well left of the golf ball and will have begun turning left. The hands will also preferably be past the ball on all shots but the driver.
My coach, Chuck Cook, says I do a great job of keeping the club in front of my body throughout the swing. Amateurs tend to swing mostly with their arms, so the body lags behind; better players can get fast with the body turn, so the arms lag behind. If you focus on turning back and through with the club staying in front of your chest, you'll find it easier to square the clubface and hit straighter shots.
Stay on the ball! This is another one that is often debated among teaching professionals (no shortage of such debates really), and slow-motion videos of touring pros are often used to emphasize the point that the head can and occasionally does move rearward in varying degrees during the backswings of many great players. (And yes, you can find videos of pros that illustrate a centered turn as well...far more these days than days of yore.)
But we've also heard the adage that we should "turn like you're standing in a barrel." While I think you'll find that there are no shortage of differences among professional golfing turns and pivots as they relate to the position of the head during the backswing and downswing, I believe that we amateurs benefit by staying as centered as possible. Why?
If you move off the ball during the backswing (i.e., your head shifts too far over towards your back foot), you've effectively moved the swing center backward from where you established it at address. In short, you've introduced unnecessary inconsistency into the swing. This means that the bottom of your swing arc has also moved backwards and will require timing to get it back to the right place consistently. Remember, pros can do all sorts of crazy things because of their talent--not necessarily because it's the right way. Also, you increase the chance that you'll sway (i.e., your weight will move to the outside of your back foot instead of staying on the inside where it should be).
Here's what you should try. Set up using the proper posture, grip, aim, and body alignment. With your shoulders properly squared to your knees and hips, your right shoulder should be noticeably lower than the left (assuming you play golf right-handed), and this will place your head slightly behind the ball using irons and wedges (the wider your stance and longer the club, the further your head will be behind the ball at setup).
Now, focus on the keeping the lower body stable and unmoving during the takeaway and backswing, as your shoulders turn and your weight turns into the inside of your back leg. The feeling you want is that the hips and knees stay parallel to your target line for as long as possible and only move in response to the shoulders turning back. Your head may move slightly to the right as a result, but it should stay relatively steady.
Achieving a centered pivot is possible when you recognize that the right hip does NOT move to the right at all during the takeaway: It moves straight back and even towards the body's center line in response to a proper shoulder turn, and the right leg stays angled towards the target (does not move towards a perpendicular-to-ground position). The right knee also stays bent. As a proper on-plane takeaway keeps the club head outside of the hands, the correct opposing move is for the right hip to move straight back. This thought should also keep you pivoting correctly.
Now simply unwind into your downswing and try to keep your head in the same place (or even moving slightly back) as your arms come through. One thing all pros do is to keep theirs heads behind the ball during the downswing. In some cases (especially with the longer clubs like driver), you will notice that the heads of professional players will sometimes even move further back (secondary spine tilt increases) as the arms come through. But that's only during the downswing and usually with longer clubs.
Strive to stay centered on your backswing pivot and behind the ball on the downswing and you'll gain consistency.
The classic teacher from the 1930s Percy Boomer coined the phrase "Turn in a barrel." Boomer recognized that turning around your body, rather than sliding your hips sideways, results in more consistency. It's difficult to hit it solid when you move off the ball on the backswing, because you have to move back to the ball the exact same amount to hit it flush. That takes more talent than most golfers have and more practice than they can afford.
"Turning while keeping your chest in place not only eliminates swaying and the likelihood of fat contact, it improves the quality of your rotation, because if you sway you can't turn. Ditch the sway and your backswing becomes 100 percent rotation."
The body needs to make a centered turn around your spine with limited up and down or side to side motion, thus creating an efficient coiling of the upper body and lower body.